Methods of Madness: Linear Lofts and Pumpkins
Quik n Cheap C4D PumpKin for the Holidaze Page 2
Ok. we have a mesh now. Time to slice and dice ala Ron Popiel.
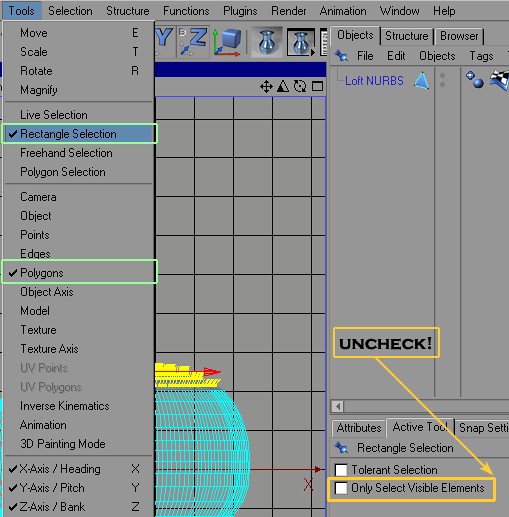
6. Select Polygon Mode and Rectangular Selection
(Tools > Polygons : Tools > Rectangle Selection).
In Atrributes Manager click the Active Tool tab, Uncheck
'Only Select Visible Elements'.
figure 6
7. In Front View select the polys to be the top cap and stem.
(Because you deselected 'Only Visible Elements' the selection will capture all
polys in 3d rather than only one side)
figure 7
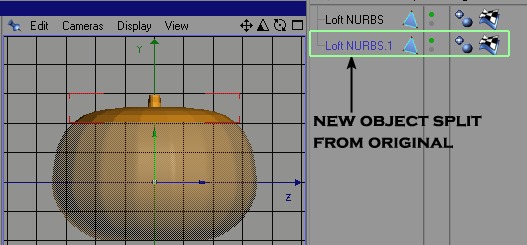
8. With selection Active...Structure > Edit Surface > Disconnect
UNCHECK Preserve Groups!
Then Structure > Edit Surface > Split
(this creates a 'top cap with stem' named Loft NURBS.1)
Name it something sensible. Like ohIwishIwasapumpkinmeyerweinerloft257986432.1.
Naming is important ; )
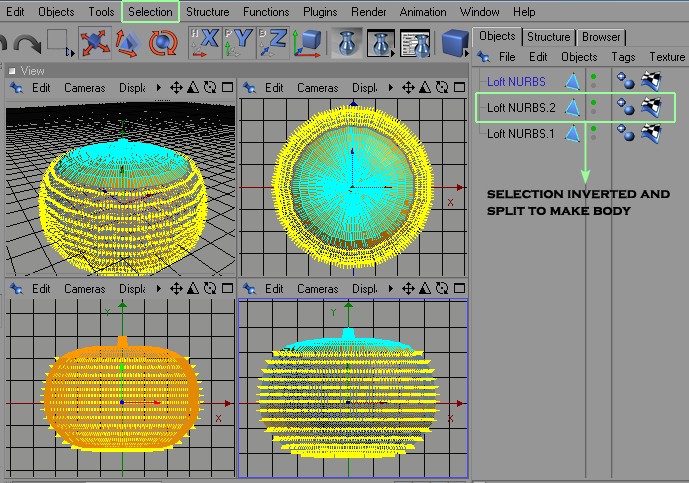
9. Click the original Loft NURBS in the Object Manager.
Selection > Invert.
Structure > Edit Surface > Split
(this makes the 'body' of the pumpkin Loft NURBS.2)
figure 9
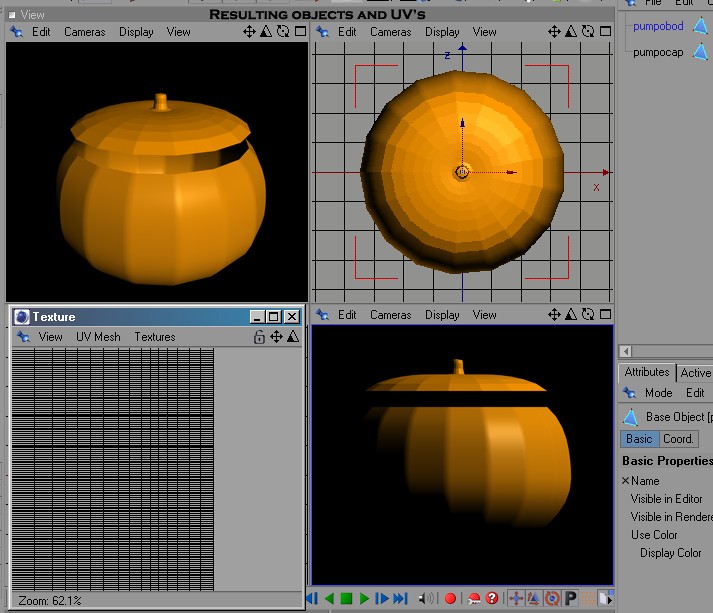
10. Select and Delete the original Loft NURBS.
You are left with a UV mapped pumpkin body and cap that can be textured seperately.
figure 10
If you want to make a seperate stem simply make the original spline less the top 3 points but make sure the last point snaps to the Y axis.
Draw a smooth freehand spline and add a proportionatly sized spline circle on XZ.
Sweep on XY.
For a smoother cap make a seperate loft object the same as above using new splines.
Pumpo On ; )
Part 2 shows how to Project and Extrude Radial Splines to make the face cutouts:
Click
here to get there...PumpkoProjection
Pinhead - October 2004
Cinema 4D Version 8.5 used