Methods of Madness: Projecting Splines
onto a Radial Surface
Quik n Cheap C4D PumpKin for the Holidaze Part 2
by Pinhead a.k.a Paul Pappathan
3DCommune.com
Slice em, dice em. make a million bitty pieces
For all C4D users ...Version 6.x up
This assumes you've read the previous tutorial, Linear
Lofts and Pumpkins ...and now what you have to do is make cutouts
needed for a face...
If you haven't done it, simply drop in a sphere primitive and follow along.
Grid and Point Snap on.
1. In XY [front] View draw the B-Splines needed for the eyes.
Menu: Objects > Create Spline Draw one eye and copy\paste for
the other - rotate 180 on H (X Axis) .
Move each 'eye' an equal distance from the Y center line. .eg. -100 and +100 on
X.
The nose is a simple n-Side.
Menu: Objects > Spline Primitive > n-Side
Attributes, 3 sides - Rotate 30 on Z Axis.
The mouth is another B-Spline with points added for more shape control.
Menu: Structure > Add Points.
Note : The splines will all be at dead center.
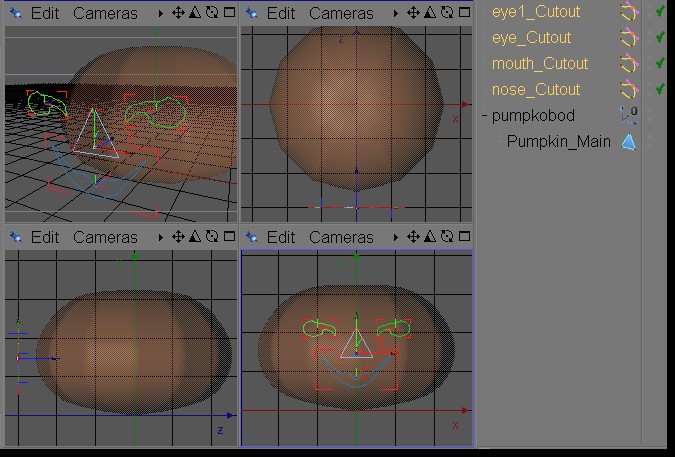
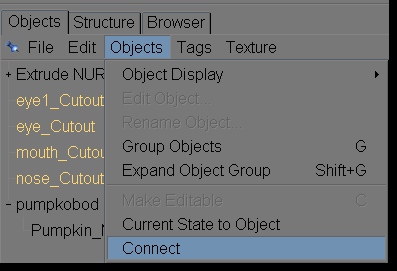
2. In the Object Manager Shift + Left Click to select all 4 splines.
In the screen cap below I've named mine...
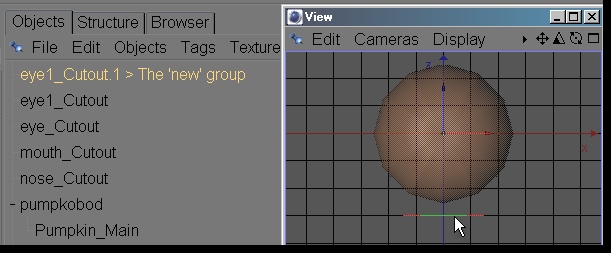
Menu: Objects > Connect
This groups the splines and makes them a single new entry in the Object Manager.
2.a
Important! As I mentioned the splines are at the object
center.
If they are projected now what you see is not nearly what you will get or want.
Using Top View, Move the face profile group out to the front of the pumpkin as
shown. One grid line in front on Z axis is fine.
You will still be able to adjust the spliney face if needed.
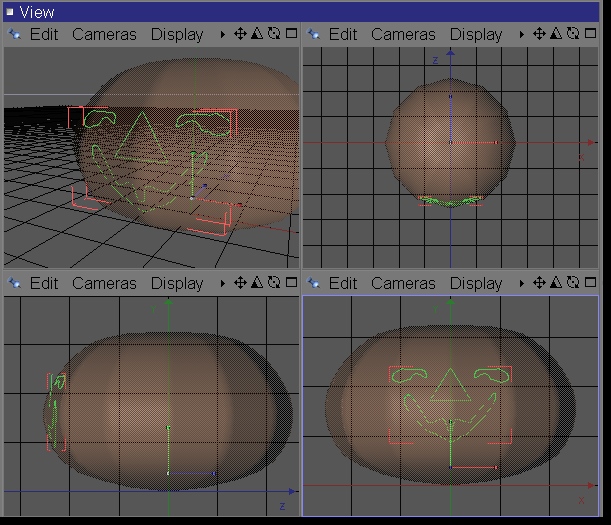
3. Return to Front View.
Because you are projecting onto a round surface the vertical center is a bit too
low.
Move the group up on Y, this will be trial and error until you get the projection
you want.
The easiest way to fix it is after projection.
So project away.
Menu : Structure > Edit Spline > Project...
Select Radial from the selection list and hit OK.
You should have something lika dis:
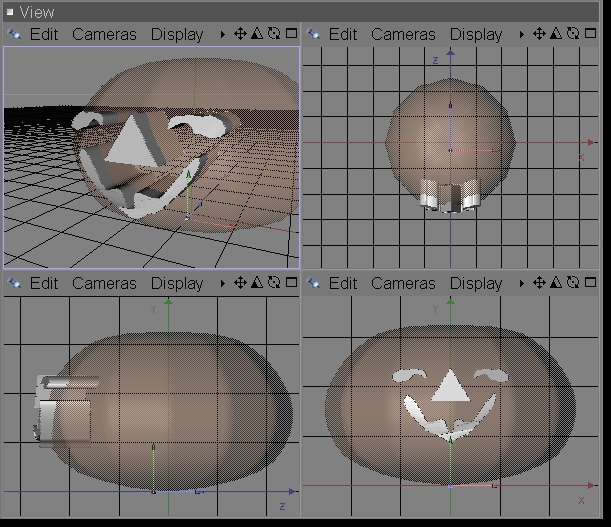
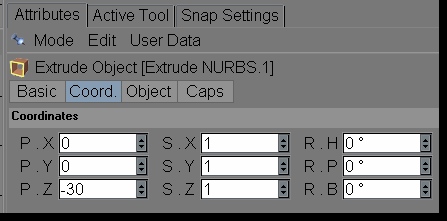
4. Extrude the cutouts - still in Front View.
Menu: Objects > NURBS > Extrude NURBS
In Extrude Attributes [Shift + F5 ] Movement (depth of the extrusion) in Z must
be enough to cut through the pumpkin body.
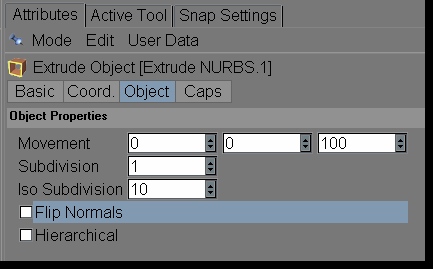
Use -Z in Coordinates to 'pull' the extrusion forward.
The result should be similar to this image (I'm using X-Ray mode to make the body
semi-transparent):
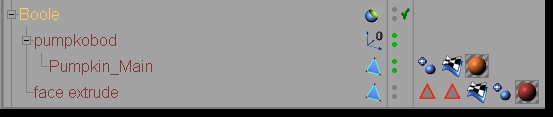
5. Boolean subtract the extrude object from the body.
Menu: Objects > Modeling > Boolean
This puts a Boole at the top of the Object list.
Select the Extrude NURBS.1 in the Object Manager and Make Editable (C Key).
You may want to Object > Connect the NURBS and Caps...up to you.
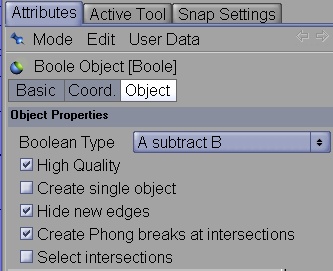
The properties I used for the Boolean object are;
Type: A Subtract B (A being the first item below the Boole)
High Quality
Hide New Edges
Create Phong breaks at intersections
Drag and drop the face shape, then the pumpkin body onto the Boole so it appears
like so:
6. Save the Project file Add mats, lights. Render...
If you want to export as 3ds or obj delete all but the Boolean object and save
using a NEW NAME.
Next up UV mapping and Texturing.
Best regards,
Pinhead
Oct - 2004, Updated Apr - 2007
Program Used: C4D ver 8.5.
Plain notated text available here:
Click here for text version