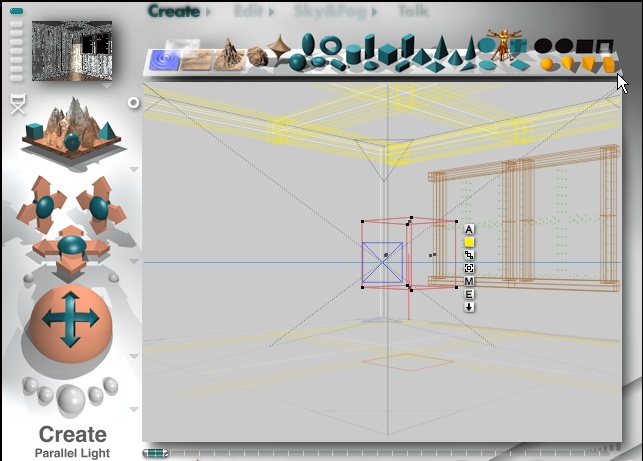
Click the Parallel light icon at the far right then click [E] to set the characteristics.
|
|
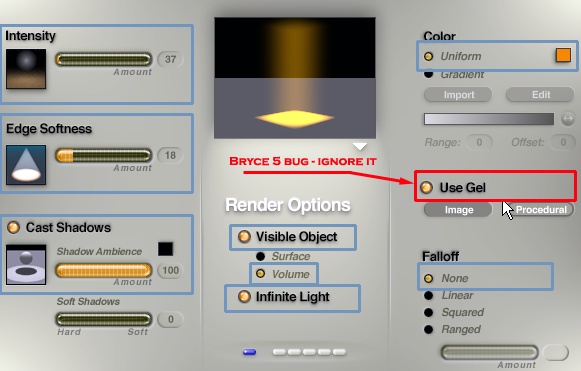
In Bryce 4 these are the settings I used with Intensity at 37 and Edge Softness at 18.
Click and drag in the top left box for Intensity (brightness) and the lower right for Edge.
You may want a different light color.
To change the color with precision Alt+Click on the color box.
This will bring up a selection of choices. I use HLS mode the most - seems more intuitive.
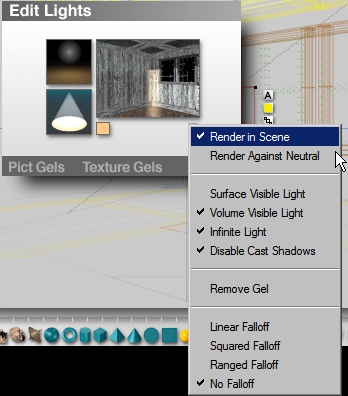 |
Here are the gory B5 details - similar to Bryce 4 but with free Light Gel Bug thrown in.
Everytime you change/save/look at a light in Bryce 5 it thinks it needs a gel.
(gel= texture or pattern overlaid on light)
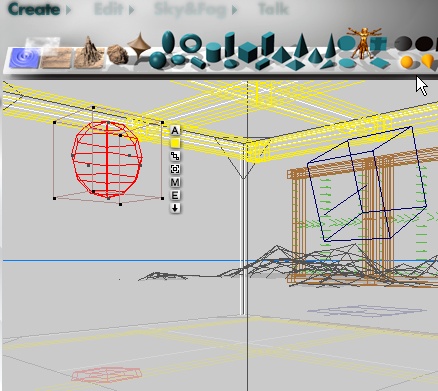
This might be the hardest part of the whole tutorial. Positioning the light can be tricky.
 |
Hold down Alt+Drag right on the Edit > Resize X Axis control until the light is roughly the width of the window.
Move it back on Z axis so it's slightly outside the window area by using the Z Reposition control or Up/Down Arrow keys.
If you hold down Alt while using the keys the movement is much more precise.
I used 2 lights sized to match both windows in the sample scene. The results were better.
It's your choice here.
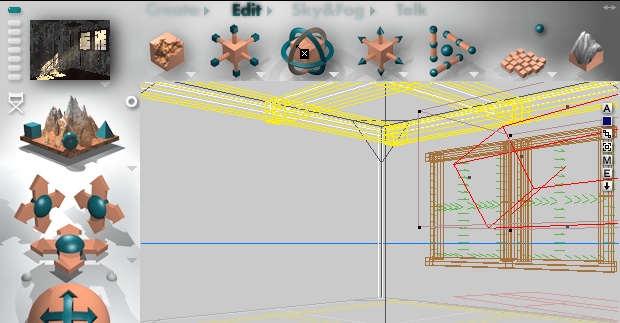 |
Use the Rotate X Axis control to angle the light at 50 to 55°, make sure the front 'light spike' is pointing into the room.
Click [A] next to the light to assure that its Postive X rotation.
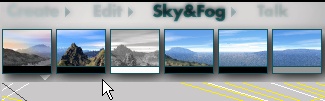
To see how light reacts with atmosphere go to the Sky Lab.
Double clicking the Sun control and Ctrl+K will also get you there.
 |
If you have to use the Sun (I didn't) make the Azimuth match the angle of light.
Just click and type whatever light angle you thought looked right for your scene.
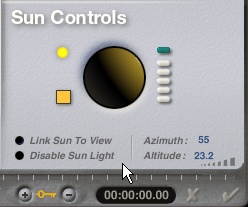 |
In the example br4 file I deselected Link Sun to View and Disabled Sunlight to make
the light rays appear more pronounced.
Click where shown above to Disable Sun Light.
When it's disabled it will show a blue 'dot' and the sun will go out in the preview window..
Amazing power you have eh? Hahhahaha
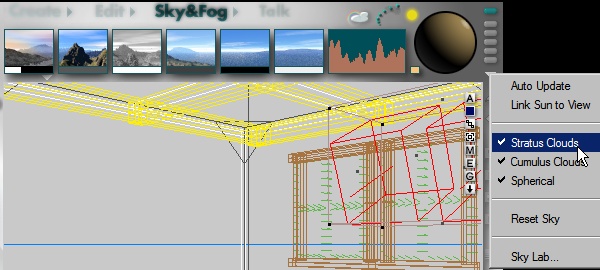
Click the little arrow located towards the bottom right of the Sun contol and activate both cloud types
Make the sky spherical for a happy gloom and doom scene.
Notice that you can also deselect Link Sun to View from here.
 |
This set up shows the 2 lights I mentioned earlier. There were more defined shadows as a result.
The room was sooooo dark that I needed to put in a dim Radial (round) light so the floor and textures could be seen.
So I asked my my friends at city hall if I could borrow a school commiteeman's head - didn't work.
Way too dim ; )
OOps..driftin again.
Please Click the Radial Light symbol and move the light toward the front left top corner.
 |
Next, click [A] beside the light and Disable Cast Shadows and make it the Squared Falloff type.
Squared light is excellento for subtle highlighting as it travels a very short distance and has a smooth fadeout.
Make a happy sky for Springtime....still snowing here. I hate New England!
 |
The most important settings I used are Shadow at 90 and Haze at 12. All shown are pure black.
The clouds are medium gray with RGB values of 149,149,149, Cover = 8, Height = 18
No Fog.
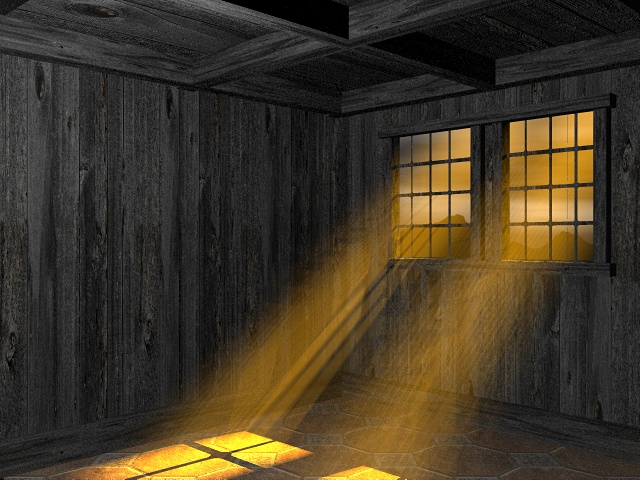 |
I threw a mountian in the far background for distance but left the room uncluttered
so you could see how the light fell.
The striations you see in the right window light are from the terrain edge
I liked them because they added to the dusty feel in the scene.
This was screen rendered using Normal Quality AntiAliasing, saved as bitmap and coverted to jpg for this very long and sleep inducing tutorial.
Well, I said from the ground up at the beginning and I hope you found something here useful.
Please ignore the fact that one of the first things I did was remove the ground.
There are no rules in creativity and I encourage you to stretch yours to the limit...amaze yourself ; )
Class is dismissed!
Hey Pinhead - get back in that corner you scroungy everettian musteline mammal.
You ain't got no class to dismiss!!! hahahhhahaaaaaa...
Best regards to all,
Paul Pappathan a/k/a Pinhead