Methods of Madness: Controlling Sweeps 2 of 2
Single Spline Sweep on Arc Primitive
by Pinhead a.k.a Paul Pappathan
3DCommune.com
Madness continues with sweeping a table top
For all C4D users ...Version 6.x up
To be a pain in da' butt I dedicate this page to Rhino users, therefore the
viewport layout will look familiar to them.
Most serious modelers get programmed into thinking one way - C4D bends to suit
; )
A Vanity table was a matter of discussion in the 3DCommune
forum and illustrates very well that what can be done in Rhino can be done
in Cinema 4D.
[often with better results]
Thank you to Lee for bringing this up!
Ok, we're off and running at Rockingham (where there's never been a sweeps but
there are arc lights)
Viewport Setup - don't place arc or draw spline yet
1. Use Cameras Menu to set up each Viewport...
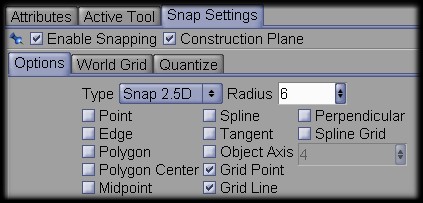
2. Make sure Default Snap in enabled! [Grid Point and Line] The only thing I changed
was snap Radius to 6.
3. Drop in an Object > Spline Primitive > Arc on XZ plane. Leave it centered
as is and make it fill 180°.
Hit key C to make editable.
When it's editable it will change in the objects menu from an arc shape to a spline
with handles as shown in 5 below.
Arc

Spline at Front View
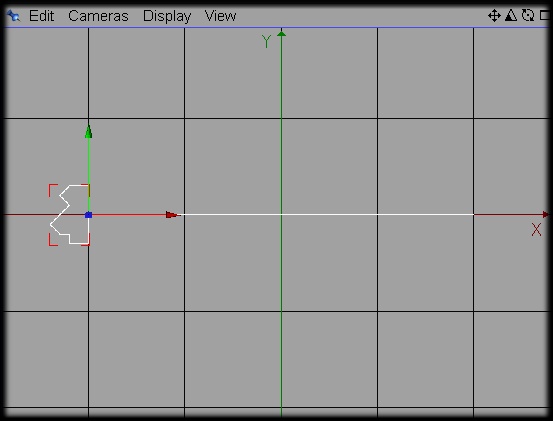
4. Draw your spline Profile [Objects > Spline] - I used Linear here - maximize
the front view [F3] and Move using the X axis control until the spline snaps to
the left side of the arc.
Return to 4 port view by hitting F5.
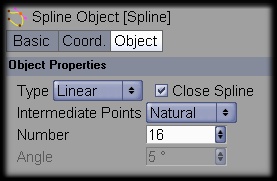
4.A Spline Settings - Note it is a closed spline with 16 points.
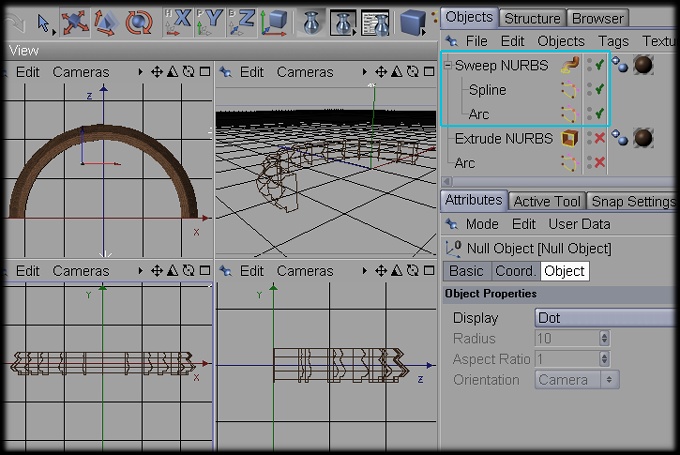
5. Add a Sweep NURBS:
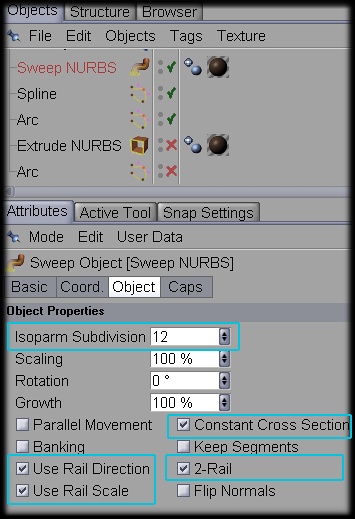 Increasing Isoparms will result in a smoother division.
6 . Drag the Arc, then the Spline, onto the Sweep NURBS so they are both direct
children of the NURBS.
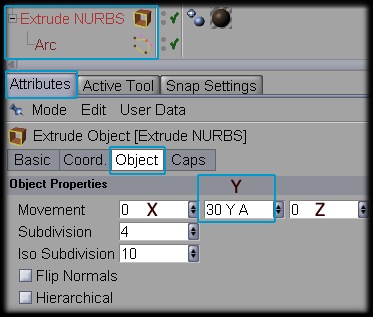
7. To make the table top just create another 180 Arc , Close the Spline, Make
editable [C] and drag onto Extrude NURBS.
Extrude (Movement) on the Y axis.
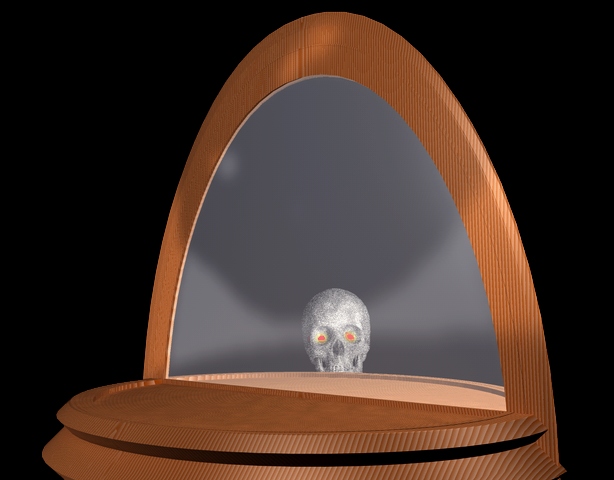
To make a mirror to go with it simply copy the Sweep NURBS with spline and arc,
rotate 90, and scale as needed.
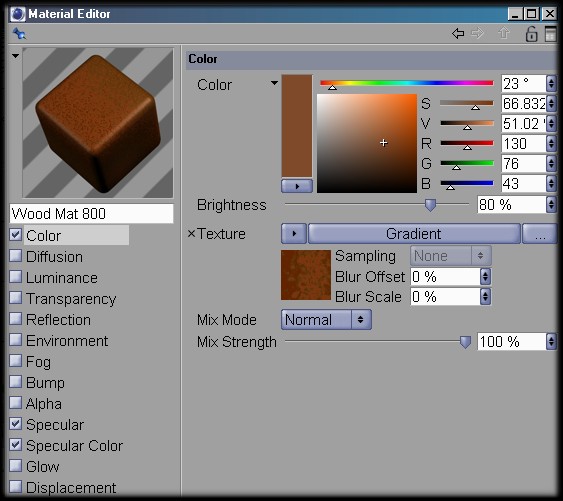
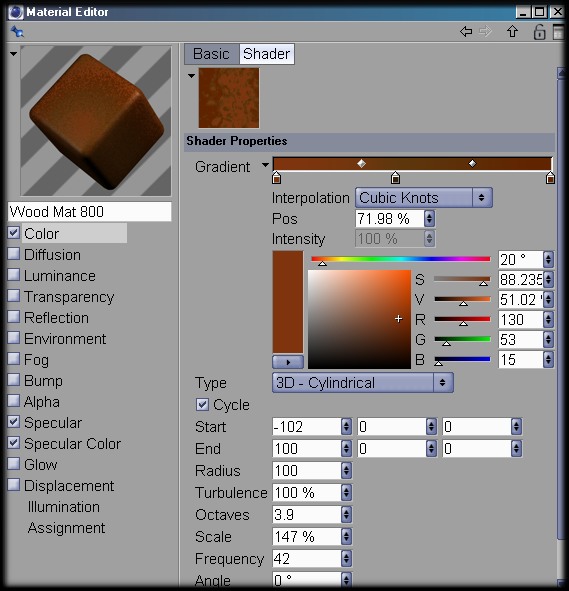
8A. To finish the completed vanity top off make a suitable wood mat-shader.
The trick to making wood shaders is Color gradients, Cubic Knot Interpolation
and scale.
Here what I made for the final result:
Choose your base color, where you see X Texture click the down
arrow and select Gradient.
Double click the Texture thumbnail.
8B. This is where you can really make decent materials if you don't have SLA as
a base 'kit'. Plus it's fun ; )
If I want the wood to have bump I use simple noise stretched along the desired
axis to emphasize the grain.
My vain result ..heheh
Soooooooooooooo...once you get this method down I'd say you could make a houseful
of furniture in the time it takes me to write a sentence or two here.
I hope this was of some help to you whatever modeling app you use.
Best regards,
Pinhead - Paul
18 September, 2004