1) Download the zipped tiffs for PC or Mac from Part One if you missed it go back here
[Free of course].
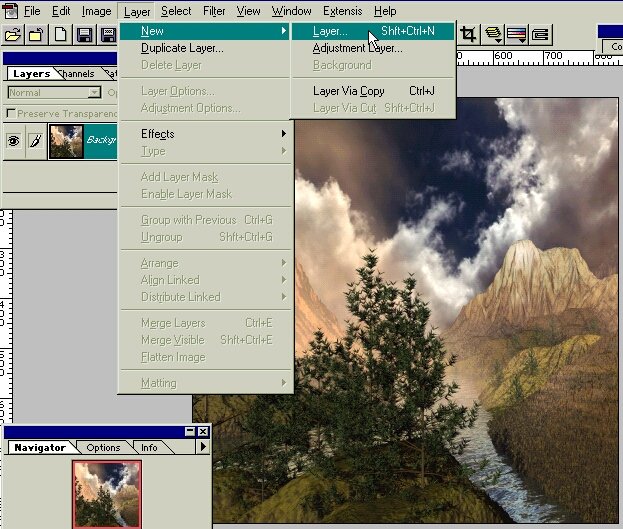
Open an image [File > Open] in Photoshop...preferably the one you, or I, made in Part One of
the tutorial. Make a New Layer as shown below. PSP
commands are in this color.
In PSP: There are a few ways to make a new layer:
A. Menu bar: Layers > New Raster Layer (must be a Raster Layer for this to work!!!!)
B. Using the Layer Pallet: With cloudtest.tif as the active window, click and hold on the
'background' layer in the layer pallet and drag it into the Background Image (the one from
part one of the tutorial).. this creates a new layer automatically in the Background Image's
Layer Pallet.
C. In the Layer Pallet of the Background Image, click on the icon that looks like a piece of
paper. This will create a new layer and then you just follow the Photoshop step 3 below (copy
from cloudtest.tif, paste into the new layer in the Background Image Layer Pallet)
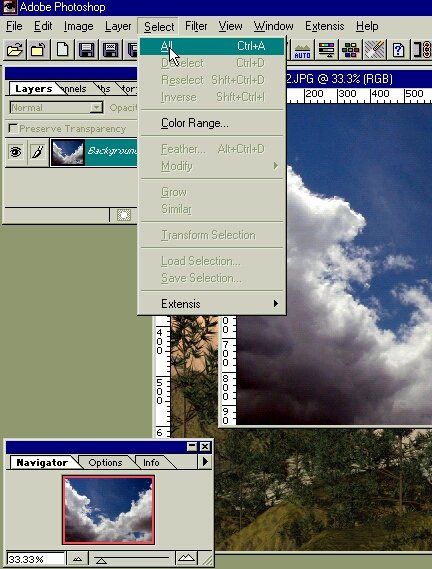
2) Open the cloudtest.tif, then Select All - you will have 2 images open. That's the idea, so make sure you keep the background image Open!
Figure 2
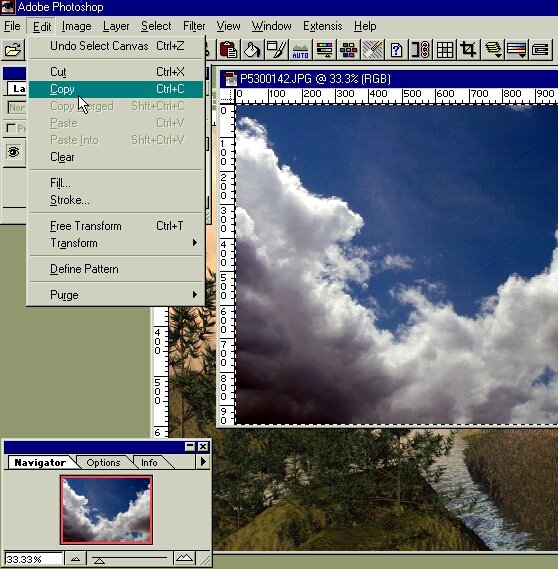
3) Copy [Edit > Copy] All of the selected sky and paste it into Layer 1 of the original image. You should now have two thumbnails showing in the Layer Menu Preview box.
Figure 3 Select All, Copy, Paste
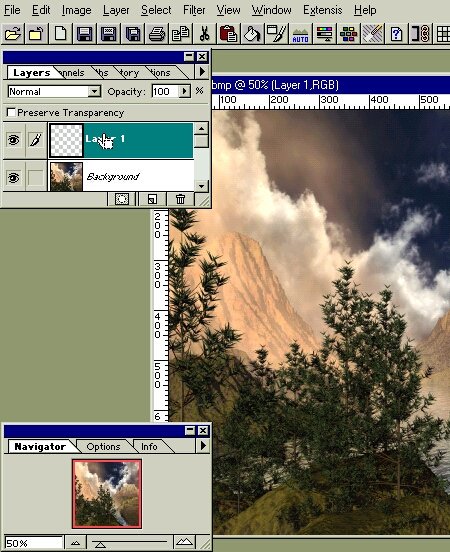
4) Below is a screenshot of the Layer mini menu - Make Sure Layer 1 Is
Active!
You should see the clouds in layer 1
Click on the area shown
if it isn't selected. Please? or do not, it's your decision.
You are da Boss
Figure 4 - Layer 1 Active
5) Ok folks below is what you should have...now you can start the dramatic
music.
Hahahahahaahahahaa...I have Crazy Train by Ozzie cranked at the moment.
Very relaxing. A little too tame for me though.
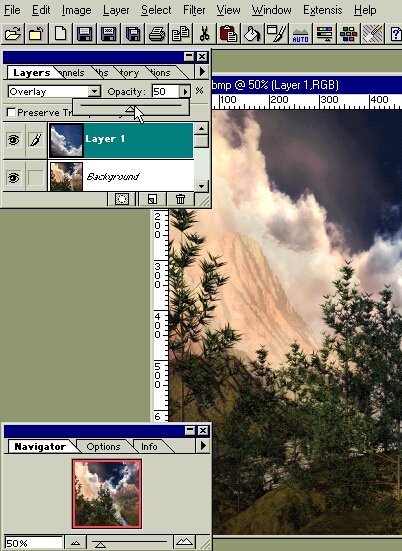
Use the drop down select to change Layer 1 to Overlay at about 50% Opacity,
You will see the result right away.
Overlay is like a combination of Screen (lightens mid tones) and Multiply (darkens mid tones)
modes.
In PSP: Right click on Layer one and choose properties.
Set blend mode to Overlay and slide opacity slider to 50 (or type it right into the opacity
box).
Figure 5 - Overlay
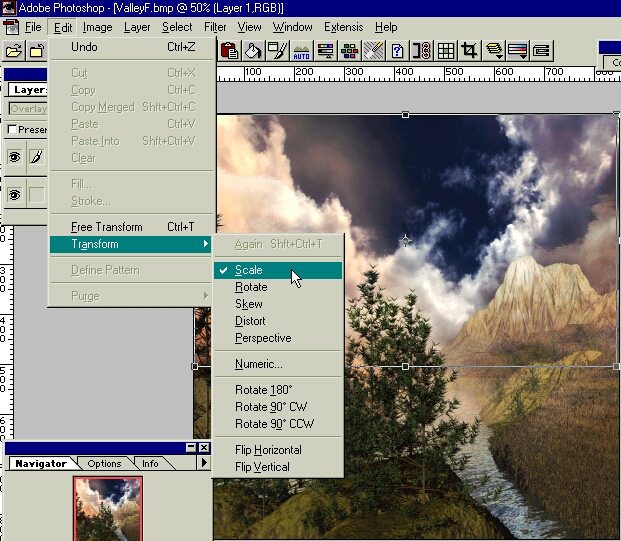
6) Go to Edit > Transform and Scale the Cloud Layer 1 to where you think the overlay brings out the best features. Like so:
Figure 6 - Scale Layer 1
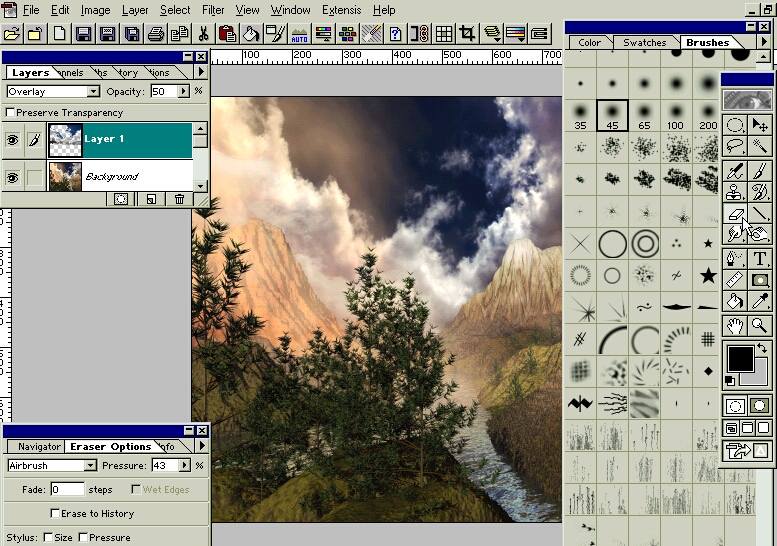
7) Depending upon your image size, choose a large Airbrush as an Eraser
and set it at around 30-40.
The Eraser icon looks like one of those old fashioned Chalkboard things that I used to throw
at the teachers head. It gets better use here (?). Hahhahaaaaa…Maybe.
Use the Airbrush Eraser to blend out any obvious lines.
Remember, you are erasing from Layer 1 not the background image!!!
Figure 7 - Erase
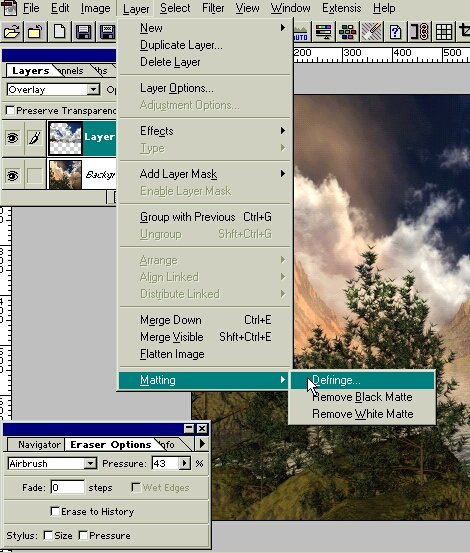
8) Defringe Layer 1 by 1 pixel as shown below - this will get rid of
garbage pixels and make the blended edge areas more even.
In PSP the defringe command is found under Selections > Matting > Defringe.
To
defringe, the selection must first be a floating selection = Selections/Float from the Main
Menu. (Thanks TJ!)
Figure 8 - Defringe
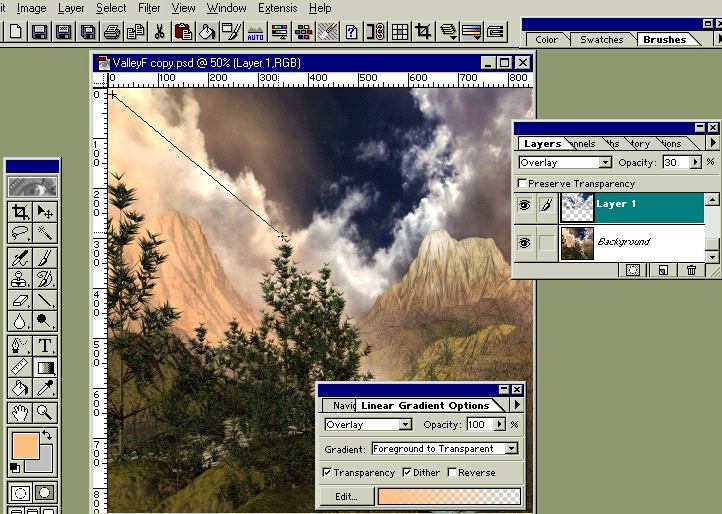
Reader Note: Steps 9 and 10 for Photoshop only... See Step 9a for Linear grad in PSP.
9) Double Click the Linear Gradient icon on the "EyeBall"
floating tool bar.
It is the eighth tool down on the right.
Set it to Overlay and use Foreground to Transparent as the Gradient type.
Hold down shift and click - this will make the cursor change to color select/eyedropper.
I chose a color from the mountain on the left.
Left click, hold down and drag from top down…try it a few times from different starting
points so you can see what it does.
I used a 45 degree angle from top left to the middle.
Figure 9 - Linear Gradient
9a) Final steps in PSP by TJ.
For the linear gradient
refer to screen shots (Note: this is PSP6).
1) Set the foreground and background colors to your desired color (Image
1) and click the Flood Fill tool.
2) In the Tool Options floating palette click
the bucket icon and set fill style to linear gradient.
Adjust the Opacity as you
wish. (Image 2).
3) Click the black and white icon in the center
, choose the gradient setting foreground-background. (Image 3)
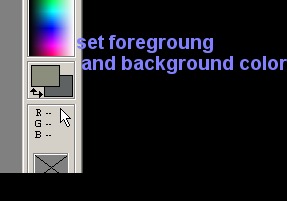 Image 1. Set Colors
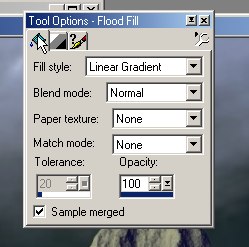
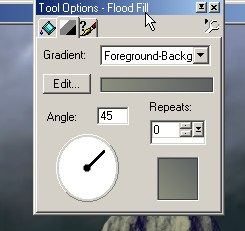 Image 3. Choose Gradient
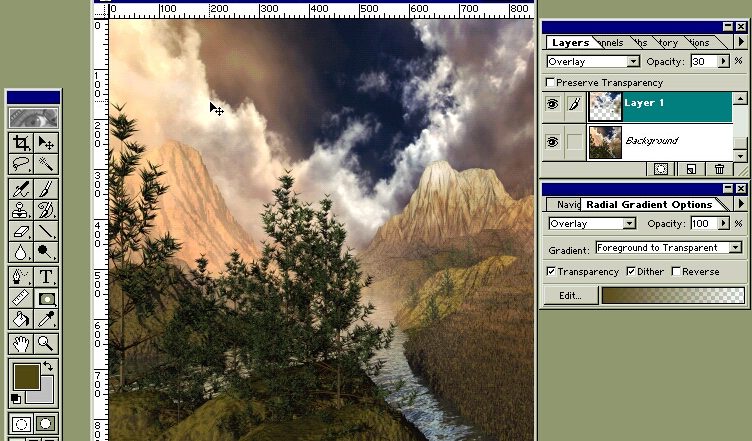
10) I then used a Radial Gradient with a color selected from the terrain
on the right.
[click; hold down on the gradient tool icon to get to the fly out menu if you can't find
this]
Radial Gradients are great for highlighting/darkening specific areas.
I applied it several times along the right side of the valley to enhance the shadows.
Figure 10 - Radial Gradient
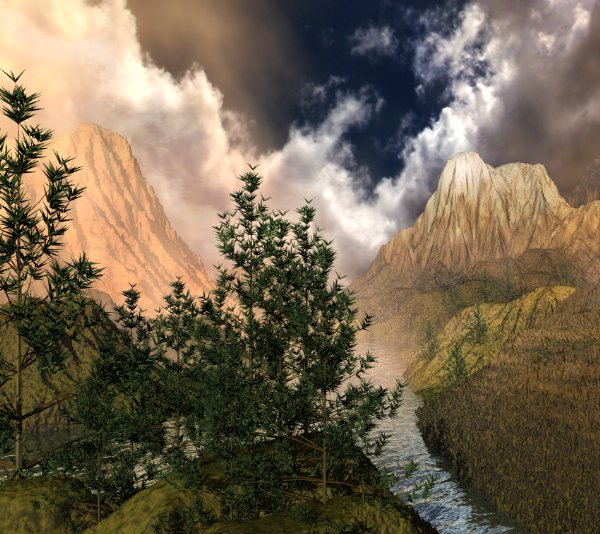
11) If and when you are satisfied with the image (I never am!)
Go to Layer > Flatten image and save in desired format.
If you want to keep the Layers intact to play with later, save the file as a *.PSD.
Here is what I ended up with.
Parting remarks.
No matter what you do to create your final image it is "legal"...in this case all
you did was use the color info from the sky image with which you made the original lattice in
part one.
As you can plainly see it is still a Bryce image.
This scene is slightly different from Part One in that the volume cloud slab and volumetric
lattice(s) are at an angle leaning forward towards the viewer.
There are also heavily
modified stratus clouds, from the DTE, with a ton of Vortex noise.
This is where a lot of
the shadows come from in the scene.
When I see images saying no post work - I say great!
Obviously, I am not that perfect.
Post work should enhance, not bury, your image.
Try everything you can with a very light touch unless it's special effects you want.
The Gradient tool is under used primarily because people think it's only to create gradients.
It is very effective as a quick transparency mask and color enhancement weapon in your bag
of tricks.
Have a great time and be creative…there is no wrong art.
It's what you see inside
yourself that is the true art.
Best regards,
Pinhead : Updated 13 Dec 2006
Many thanks to Shelly (Mercy20) and Tina (TJ) for the PSP interpretations and corrections.