Lattice Skies in Bryce 5.x
Dec 2001 - Pinhead [Updated July 2005, Jan 2007]
For new users and those of you who may be having problems making a combination lattice sky in the new, improved Bryce 5.
I'm never sarcastic. Really.
A zip download of this tutorial is available here: Download da tutorial - 1MB zip
Most of the method are the same as I described for B4 in a previous tutorial but perhaps you'll see something I don't.
Let me know please? Thank you.
There is a good 1600x1200 cloud photo you may use here: Sunset Cloud mass
If you've downloaded the zip you will find the sunset cloud jpg named CloudmassPH1600x1200.jpg inside.
First a Pinheadian explanation. . .
Symmetrical LATTICE:
A mirrored terrain mesh not something in your garden with vines and dead rodents hangin all over it!
Usually most effective when made solid with a grayscale-height map applied in the Terrain Editor. Lattices can replicate almost any object or environment very realistically as they can use photographic textures or wacky stuff you paint yourself as I frequently do.
These photo textures are put on the lattice using the Picture Editor a.k.a. LEO which is accessed via the Material Lab.
Lattices for skies work best at massive resolution, or better, with very high quality photos.
The Lattice will look best if scaled to match the picture size.
I don't recommend using any picture under 1024 pixels wide as the quality suffers as much as I! Hahahahahaa...my head is killin me.
OK, enough geek speak let's get going step by step.
Suggestion...Start with a relatively clear sky, no haze and lower shadows to about 60 percent.
Or simply use the default Plain Black background as I usually do.
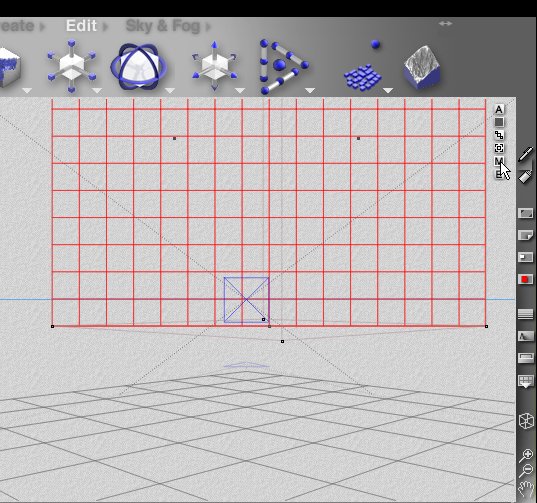
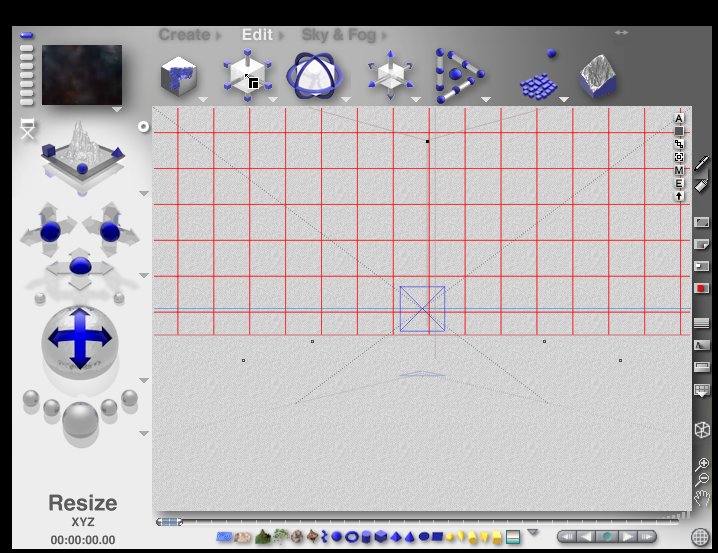
1.0: Make a sym lattice by clicking the uhhh, lets see where the hell is it, here lattice lattice...
SYMMETRICAL LATTICE symbol which looks like two terrains welded together bottom to bottom.
Hey! No dirty thoughts allowed - this is serious sh*t!
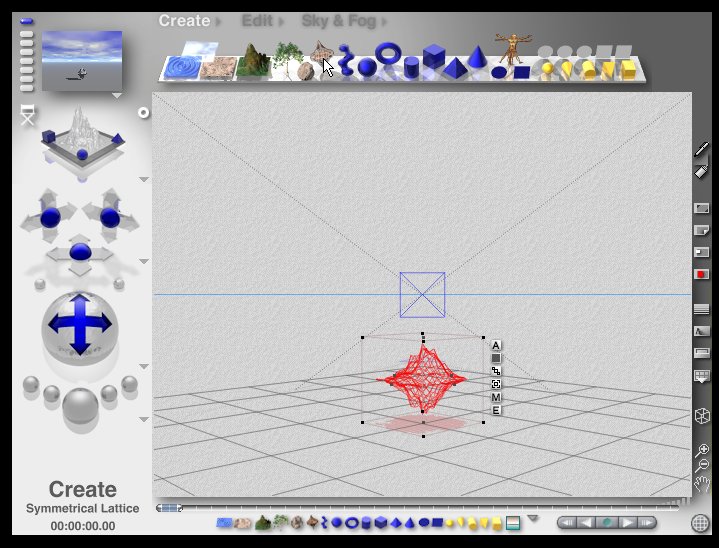
2.0: Size the lattice to match the picture size you're going to use.
This isn't absolutely necessary just seems to work best if you have a decent sized sky photo.
The most important thing is to keep the Y Axis Flat at all times throughout this whole process.
3.0: Click the [E] next to the lattice to enter the Terrain Editor.
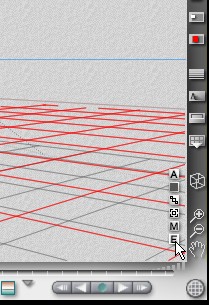
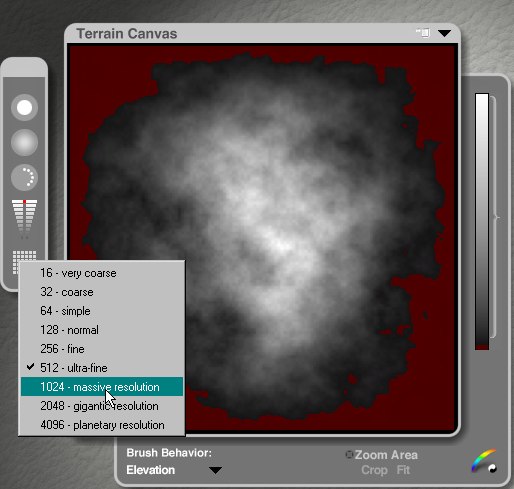
4.0: Click the small black down arrow shown below at the top right of the Terrain Canvas and select Solid.
This is very important. If you don't make the lattice solid you won't see it!!!!
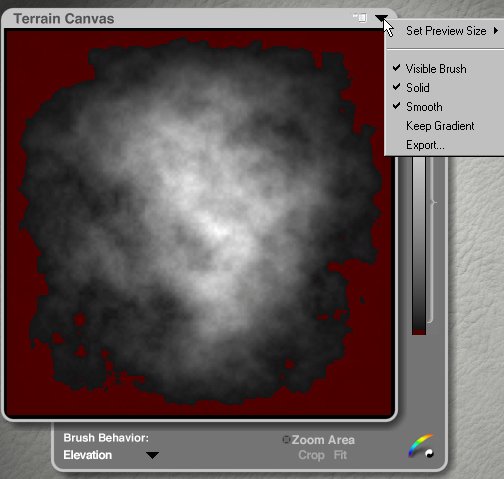
5.0: Click the Grid box at the bottom of the floating brush toolbar and use at least Massive=1024 resolution.
This helps to smooth out any minor defects in the photo especially if you use jpg.
6.0: click on the Pictures tab in the Terrain Editor and next Load at the left side Picture Preview box.
You will get a browse option...go hunt down your photo and click Open when you find it.
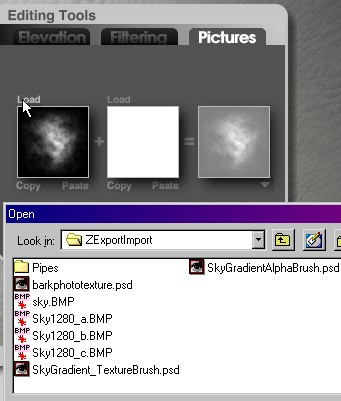
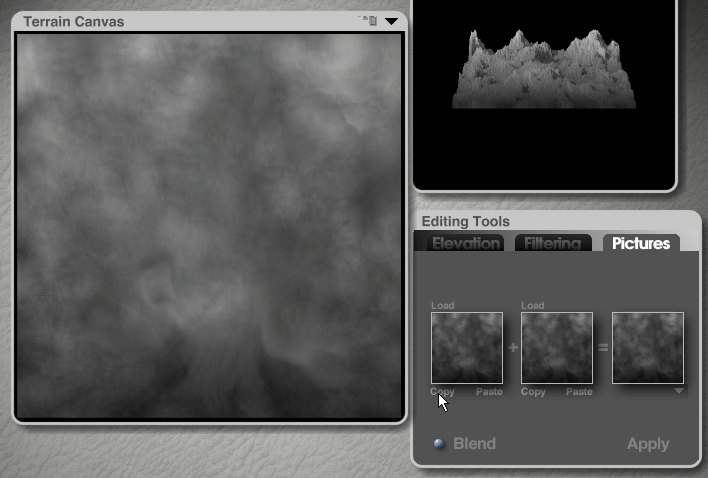
7.0: You will see your picture in the left preview.
Click Copy beneath it and then Paste the same image into the Middle Picture box.
Hit Apply at the bottom and you have your sky-cloud form ready for picture mapping. Cool!
Click the Check mark at the bottom right of the terrain editor to exit and return to the main Bryce screen.
8.0: Meanwhile back in the slumz of Everett we have no sky!
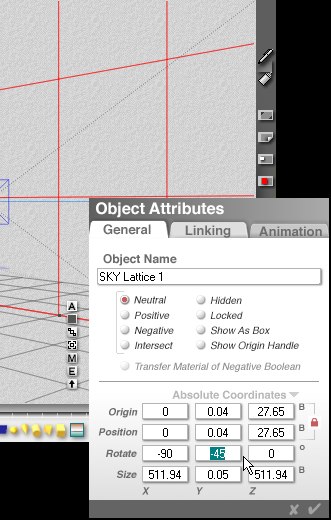
But you can hit the [A] next to the lattice again and rotate on X and Y axis as shown.
Simply click and type into the appropriate box.
Notice that you are flipping the X axis towards you? This is Object Top...important to know. Trust me, it is.
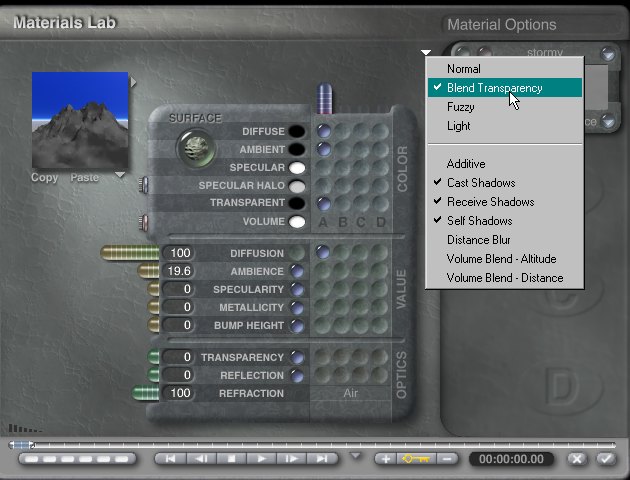
9.0: Move the lattice back a bit in the scene and then click the [M] to enter the Material lab.
9.1: Use the settings shown below in the A Channel.
Blend Transparency will allow color, shadows and light to have an effect on the lattice.
You will need your sky picture again, so I hope you remember where it is. I sure don't!
9.2: Click the letter P on the Channel A preview box to let Bryce know you plan on using a picture.
Say Hi to LEO...[Create 2D Picture Object]
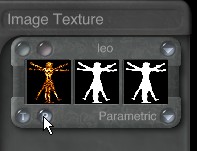
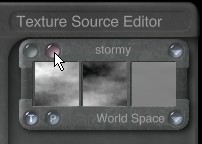
9.3: Click the little pink button above Leo's head to enter the Picture Editor
(why do they call it that when you can't Edit a damn thing???!??!?! Tell me, tell me, tell meeeee!)
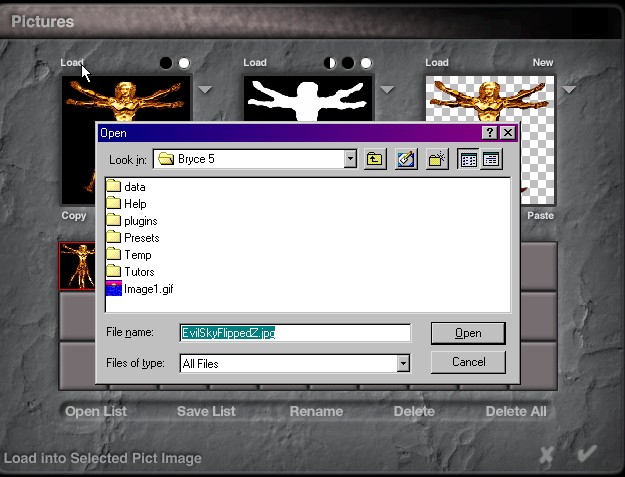
9.4: Click Load above Leo on the far left and Browse for the same picture you used earlier to make the lattice.
When you find it click Open. You should see the sky now in the box on the far left.
9.5: Click Copy at the bottom of the left preview box (where your sky is) and then Paste under the Middle box.
Say yes to the stupid dialog that asks are you sure. You're sure!
Click the check mark at the bottom right to exit the Picture Editor.

9.6: Ok, here's a step that many miss.
Because the lattice was rotated up towards you does not mean that the mapping has changed.
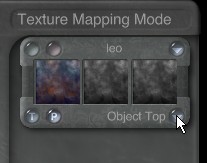
It is not Parametric or Object Front.
It is still Object Top as it was in the beginning.
So pleeeeaaaaase Select Object Top at the area shown from the drop down menu.
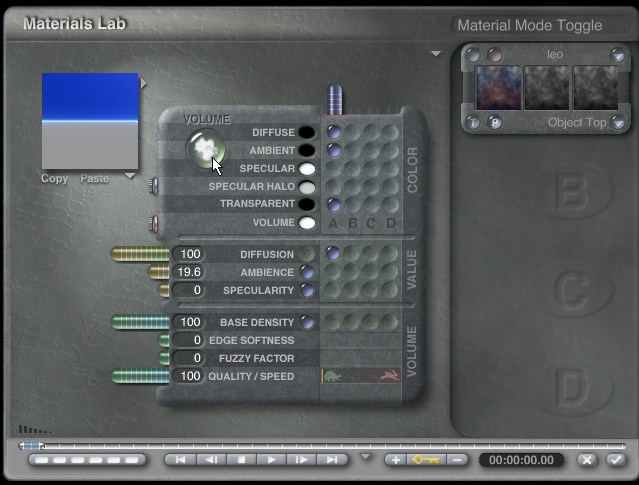
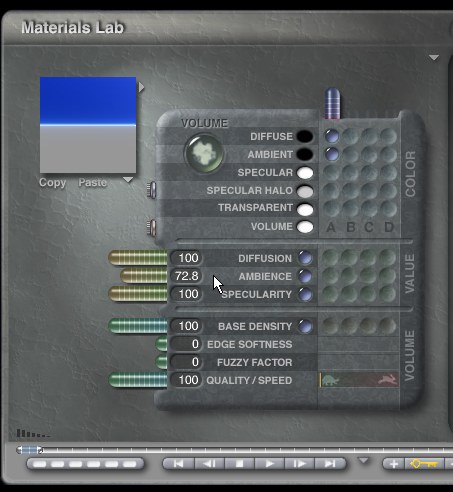
9.7: Click the Volume/Surface globe once to activate Volume material mode.
Start with the settings below in A channel.
Base Density and Quality at 100 will not slow this down at all because the lattice is very thin.
Nothing is carved in stone here - these are suggestions to get you going.
Note: you will not see anything in the preview with the default settings so don't think there's nothing there.
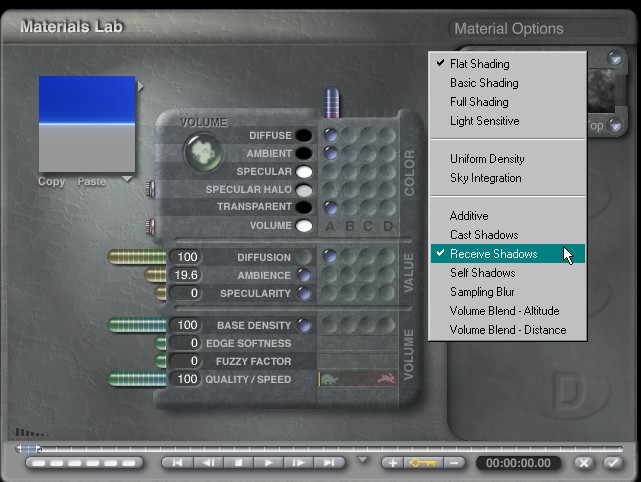
9.8: Disable Cast Shadows and Self Shadows...the shadow from a solid lattice will screw up he whole scene!
Leave receive shadows if you want to pick up the color from the sky settings later.
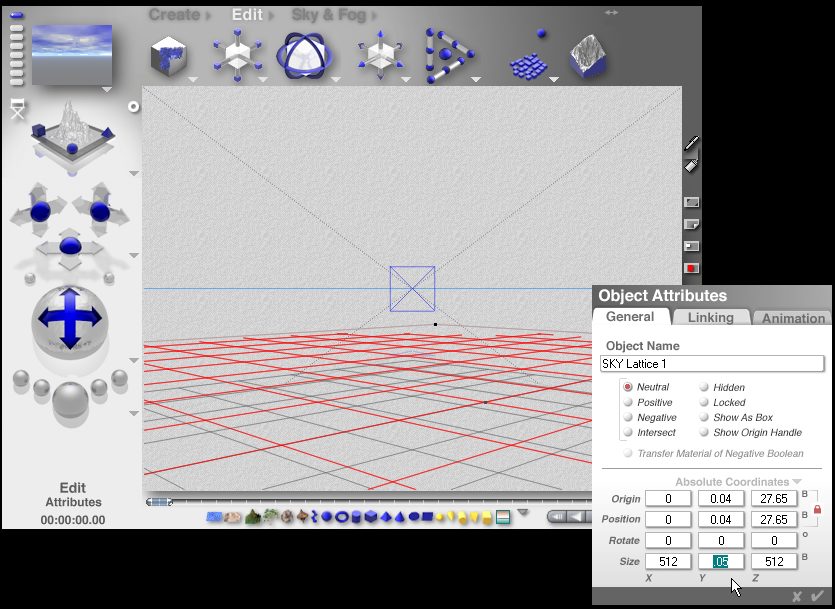
10 : Resize, position the sky lattice as you like. Keep Y Flat after resizing by clicking [A] and entering a low number such as .05 in the Y dimension box.
11 : If you use a very dark sky, like I did in the example, simply go back to the Material Lab and increase the Ambient and Specular values a little at a time until you get what you want.
Result 1 using the settings shown:

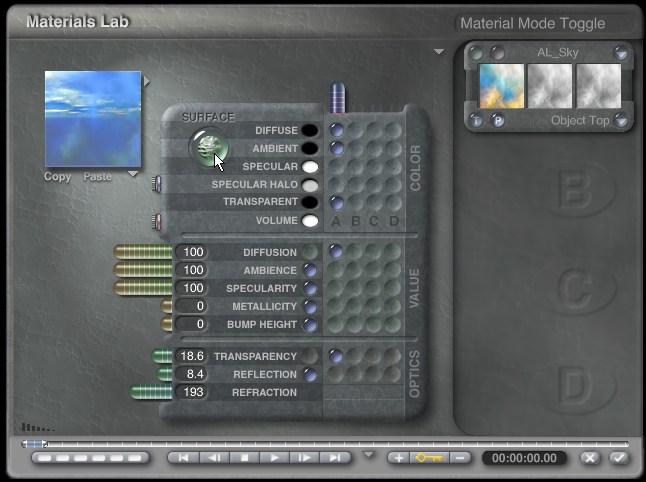
Option: Here's another setting you can try as a semitransparent surface map applied to the same lattice.
Note that the Transparency in the channel A Optics section is selected and other settings are different!
Result 2 using the settings above as a semitransparent surface with haze applied:
In parting. . .I often use a combination of 1 volume lattice + 1 surface lattice along with a tweaked Bryce sky which has low white clouds.
To make a volume lattice more transparent decrease the density and increase the Fuzzy factor. This will add to render time, especially in Bryce 5.
The lattices do not have to be facing you...angles, shadow color and sun position all make a dramatic difference.
This method also works very well for realistic walls, rocky ground surfaces and water planes.
Try everything you can and let me see the results!
If you have any problems please feel free to post a message in the Bryce or Bryce 101 forums at 3d Commune.com
My best regards.
Paul Pappathan a.k.a Pinhead
Updated URIs - added new links to zip and cloud image.