Make a Terrain Door in Bryce
By Pinhead and Lonegunman of 3d Commune September 2001-Updated Dec 2006
For seimi-sanity, Download terrain obps, psds color with alpha. color and bump jpgs and br4 file here: ph_doors.zip (2830KB)My thanks to Lonegunman (Rick) for his help and willingness to share.
Ok, lets go to LA and visit the surviving members behind the doors of their hotel rooms ; )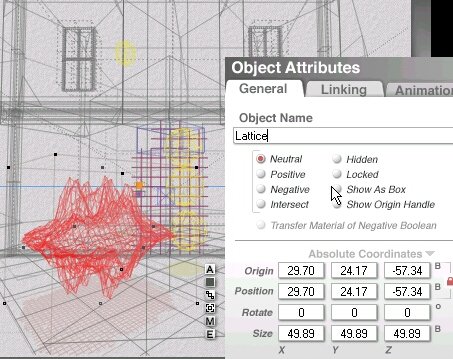
Step 1. . . Make a sym Lattice. Click [A] to see Attributes. Give it a name.
Door perhaps !? Hahahahahhaha
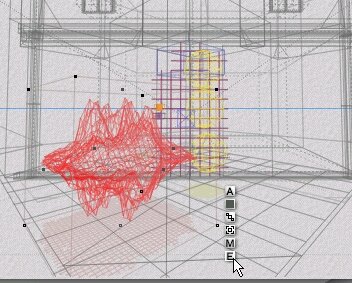
Step 2 . . .Click [E] to enter Terrain Editor.
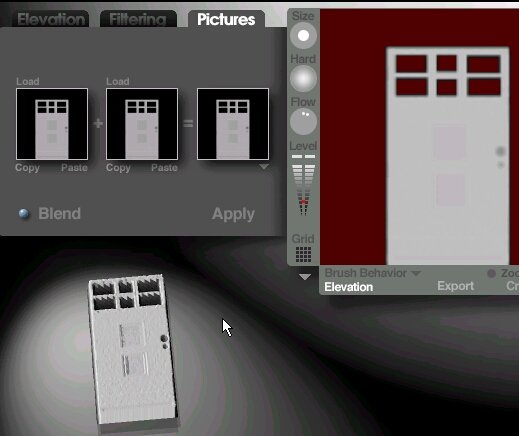
Step 3. . .Click Pictures > Load terrain_door.jpg. terrain_door.psd or terrain_door_windows.psd at top left,
Copy and Paste into Middle > Click Apply.
Note: Click Grid for 1024 and the down arrow below Grid for Solid.
The image(s) were sized at 1021 to avoid edge clipping
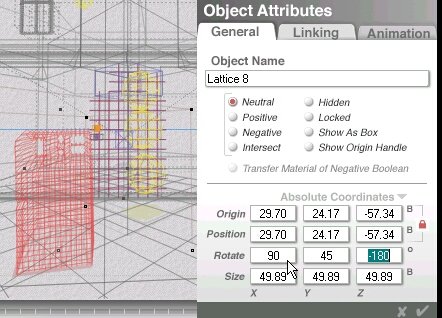
Step 4. . .Click [A] Next to lattice and Rotate X, Y and Z as shows (Type it in).
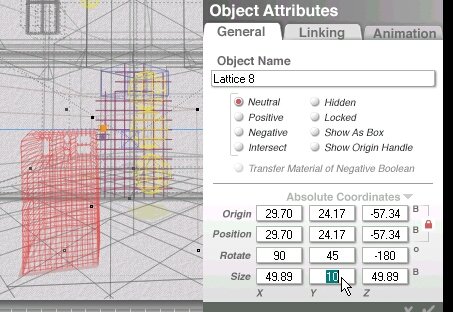
Step 5. . . Resize Y as needed - this controls how thick the door will be.

As you position and resize the door in your scene keep checking the Y thickness.
The thinner it is the better it will look.
Why? Because the the thicker it is, the less the image resolution comes through.
This is a grayscale Lattice (mirrored terrain) made from the image.
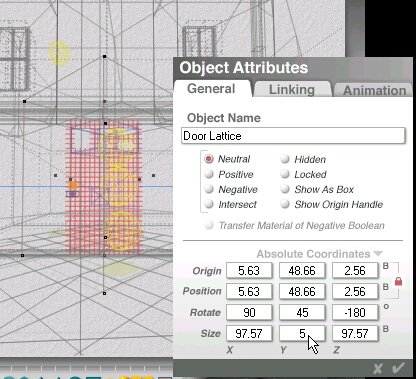
Sanity Check...Notice that the door is only 5 Bryce units on Y axis.
Now, lets get to texturing the door ok? OK.
Next Section - Mapping the door.