Part 1
A
tutorial for newer Bryce users. Explains
in full detail how to create a panoramic
scene.
Covers document setup, sky, water, terrain, light use and render.
Not
to be confused with a 360 Panorama render!
This is the traditional panorama which
is defined by an aspect ratio (width and
height) of 8 : 3,..Not the full
360 degree wrap that is popular for abstracts.
You are not going to be using the below
function to be specific:
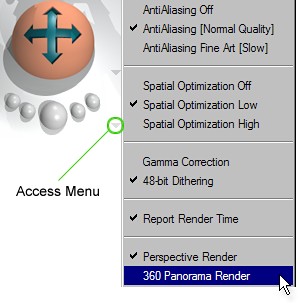 |
A
360 Panorama Render ain't what we're
doing.
But here's a simple explanation anyhow
for future reference.
360° Panorama produces an image
that looks as if your camera had a
crystal ball for a lens.
The left and right edges of the image
made join seamlessly - similar to
a flat world map.
When you render a scene as 360°
the image will not look like the wireframe
in the work area. Just like a map,
there will be major polar and equatorial
distortions which are not desired
when creating a static landscape.
Geez, wasn't that fun...I almost sound
like I know something. |
Now
it's time to get serious. Really.
This tutorial will walk you through each
and every step - and possibly bore you
into a zombie like state from which there
is no recovery.
You will spend the rest of your existence
mindlessly craving human brains fresh
outta the can.
But if you are new to Bryce and go through
this, from beginning to end, you will
learn most basic functions and touch on
a few that are only whispered about in
dark, dank (and real smelly) corners.
I'll also show how to set a color scheme
- although I use blues here please feel
free to make yours Jack the Ripper Jello
Red.
I'm going to start by showing how to use
Document Setup.
Every output file is a 'document' to a
computer and it's no different with rendered
images. Document Setup allows you to define
the width, height (aspect) and size (resolution)
of what you see when working in the main
Bryce screen area.
Your Bryce default file is set to load
by default...amazing eh? hahahahaha.
To keep from overwriting the default.br*
ALWAYS go to File > New Document.
This assigns the file name 'untitled.br*
and presents you with the Document Setup
dialog right away.
Ok, on with the brain drain...this
will be confusing to people who can't
work backwards ; ) You'll see why.
Getting
Started
 |
You
made a New Document Right??
If you want to change the ratio of what
you're working on at any time just go
to File > Document Setup...
|
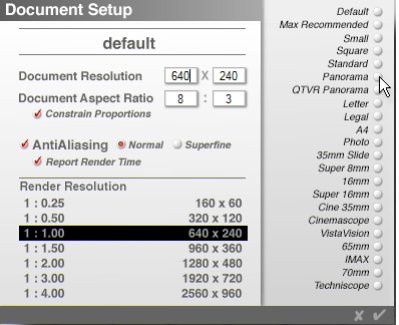 |
Click
on Panorama
where shown.
If you can't work at the 'suggested'
size (which is 1120x420) and would like
to see what you are doing simply type
in the width you want.
Where you see the words Document
Resolution type 640, 800, whatever
in first box to make things more manageable.
The checkmark in Constrain Proportions
will keep the height in sync.
Click the check at bottom right to Apply
and Exit. |
|
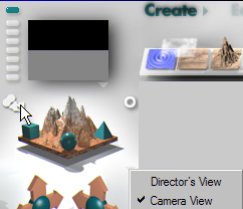
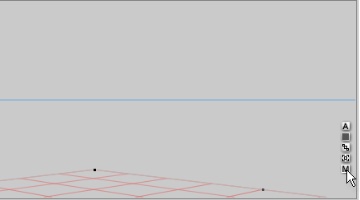
Now
it's time for me to drive you nutz.
Click the Directors chair icon and change
it as shown to the Camera View.
Now everything you move in the scene
will be reversed.
Up will be down, left right and so on.
Why am I doing this you ask?
I'm not - you are ; )
Just trust me... I'll bet you use camera
view as habit after a short time once
you see what it does to skies. |
Onto
da Scene
I
assume you have a Ground Plain - let's put
a material on it that works with this scene.
 |
 Sample A. Sample A.
|
Main View:
Left click and select the ground plain.
Click the [M] and you will be sent to....
|
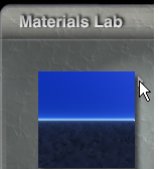
The Materials Lab:
But we want to get a different Mat (play
along here folks).
Hit that little arrow pointing right up
there.
To do this please use a 20oz ball peen
hammer. |
To Material Presets
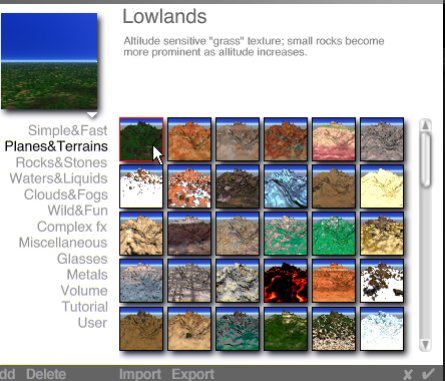 |
Pick
from Plains and Terrains.
Lowlands is fine...
The color will be changed and as it's
for use only as a 'light stopper' there's
no need to be picky.
Plus I like the name Lowlands...reminds
me of the swamp I live in.
In Bryce clicking the checkmark
always means to Apply changes
and Exit.
If you're in Material Presets you will
be returned to the Materials Lab so you
can adjust the Mat. |
Back
in the Mat Lab again
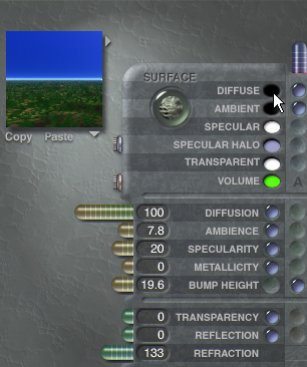 |
Well
golly gee willicurs- those mat colors
are rotten!
What da hell is with that green???? Call
the D.O.E!
I think I've been over exposed to rad
gamma!
Sorry - got carried away ...radiation
and me don't mix.
To get truly frightened click in the ellipses
next to the words Diffuse and Ambient
; ).
The colors can be very simple here and
a complex mat isn't needed.
(..Don't touch anything else or you will
explode - I swear it..) |
Detoxifying the Material

|
|
WHAT THE!
It's the I am the 50 foot glowing woman
Material
Uhhhh...you can save this if you want.
It must have some use...hahaahhohohoh
- yep.
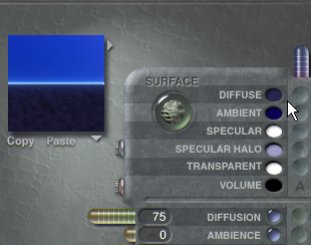
|
Picka your Palette
Left click and select a range of dark
blue-ish colors.
(if you Alt+Left Click in any color
selector you will get a much more comprehensive
set of color tools)
Change the Diffuse, Ambient and Volume
colors.
Reduce the Diffusion amount
by using the slide control or simply
typing in the box where you see 75.
|
Exit the Material Laboratory screaming...
Playing with Water

Create a water plain
It will be the proper height above the ground
by design
...I think.
|
Water is the stuff rich people have to drink.
It comes in fancy bottles!
Click [M] next to the water plain.
See
Sample A above if
you forgot what to do.
|
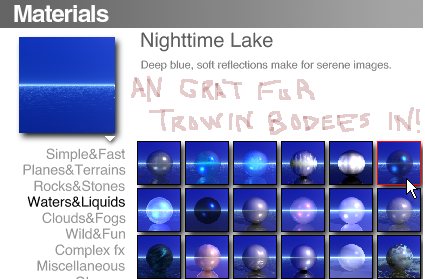 |
Select Nighttime Lake - apropos
qui?
Click the check at bottom right to Apply
and Exit.
We can now go trash this mat just like
the other ; )
I'm snailing awaaaaaay....
|
Water Mat - Minor Adjustments
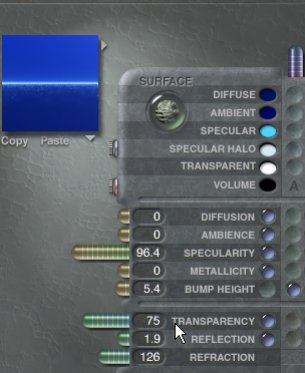 |
Again, change colors as shown.
Diffuse, Ambient and Volume.
Please note - I've lessened the Transparency
from the default of 96.4 to 75.
That's it here...Apply and exit.
|
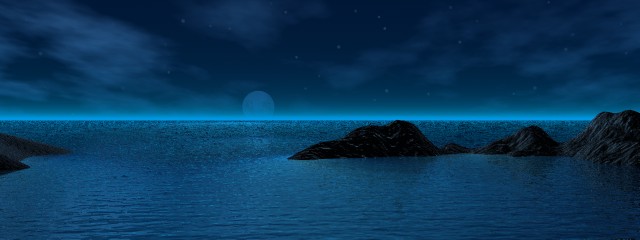
Sanity Check 1
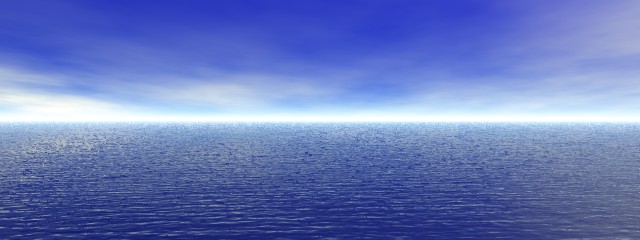
You should have something that looks similar to the above at this point.
Don't worry if it appears to be garbargo.
The sky and atmosphere will fix it right up.
You can download the sanity
check scene file here.
88KB zip
Onto Part 2 - Sky and Atmosphere


Pinhead
- March 2005
Some more of my tutorials here. . . |