Part 3
Adding Terrain
These
are simply suggestions. I'm not overly picky
about terrains and throw them around wherever
I think they look right. In this scene you
don't need highly detailed terrains. It's
the shape made that's most important.
This is not going to be an in depth review
of the terrain editor.
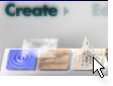
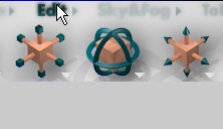
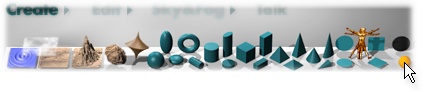
On the Top Bryce Toolbar select Create,
then click the little terrain icon.
 |
A
randomly generated terrain will be fine.
But the resolution should be increased
so whatever mat is used doesn't look
like mud.
Because you are using Camera view the
terrain will drop into the scene at
front center.
|
OK,
the terrain needs better resolution.
Resolution in this
case refers to the surface quality of
the terrain grid (mesh polygon detail).
The higher the detail the heavier the
file weight.
Note, the higher the resolution the
better the terrain surface will look,
especially when close to the camera.
I want you to know where to change it
for future use if you get a real s$#%@^^!
lookin terrain when working close to
the front of a scene or zoom in with
a camera.
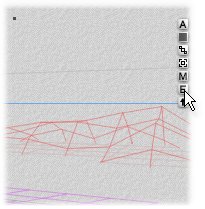
Click [E] to enter the Terrain
Editor. |
 |
Terrain Editor
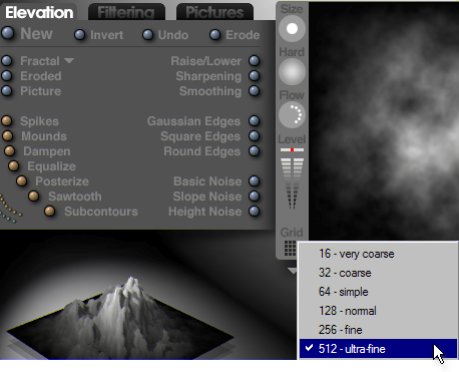 |
Click the word Grid.
Select 512.
This is medium resolution and good enough
for the scene requirements.
If working with a scene that features
terrains close up don't hesitate to use
1024 or 2048 for front terrains.
We're going to stretch, mangle and mutilate
this terrain so no need to go for overkill.
Click Basic Noise a few
times.
Hit the blue bead next to Eroded
(NOT ERODE).
Click Smoothing once.
Exit the Terrain Editor
|
Terrain Material
Whatever
material is on it probably needs to be changed.
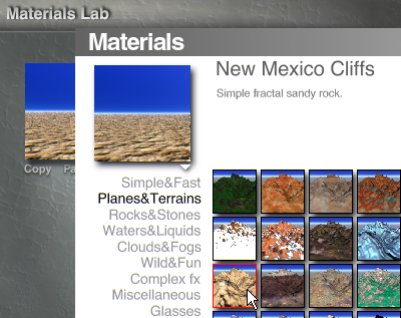
Click [M] to go to the Mat Lab then go to
the Presets as I explained ealier...you
do remember don't you? No? hahahahaha...ah
geez I feel soooo bad.
|
Material Preset - I've been to New Mexico and
never fell off a cliff that looked like this!
|
Select
New Mexico Cliffs.
If the base color is changed it will do
fine as a substitute for costal rock.
Apply and Exit the Preset Library and
return to... |
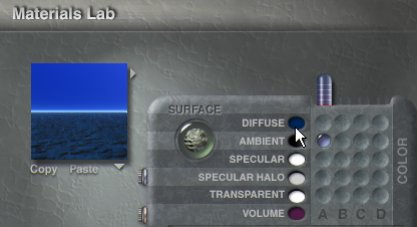
The Material Lab
Remember this place? Eh? Eh??
 |
|
Change the primary Diffuse Material Color
Just click in the Diffuse selector at the
top of the list.
Change it to a dark blue - Alt+Click in
the ellipse and select the HLS palette that
opens and reduce Saturation.
|
|
Size, Scale and Position
 |
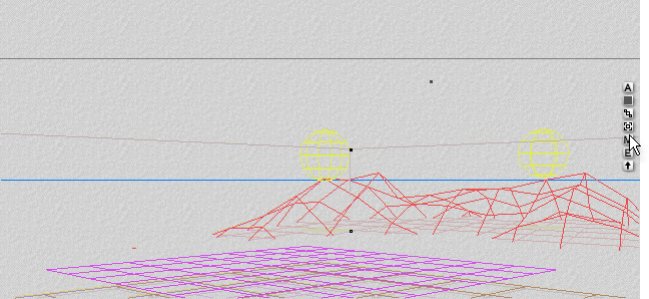
Use
the Edit controls to move
the terrain back into the scene,
Increase scale to make if BIG...rotate\resize
to get a profile you like. Stretch\squash
it on X and Z.
Try to keep the terrain top below or right
on the horizon area. You want the terrain
tops highlighted by the horizon.
Ctrl+D to Duplicate the terrain if you feel
your scene needs to be broken up further.
|
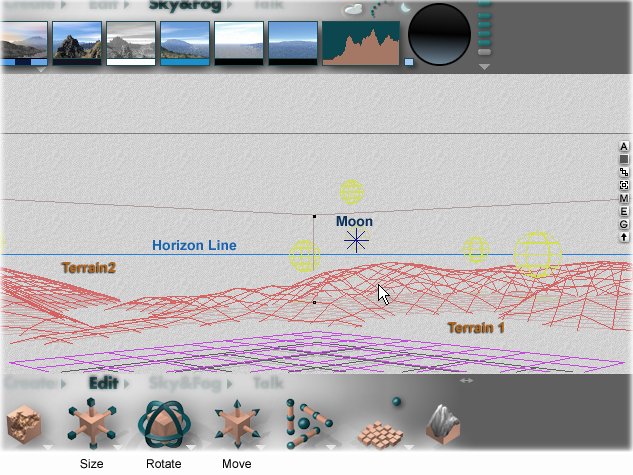
You are here - hopefully
 |
Don't
try to copy anything exactly - do it your
own way and make it yours alone.
Nature is chaos so why should you be overly
concerned with placement of rocks and such?
Simply put stuff where it looks right to
you.
Above you can see the main components that
make up this scene. Lights will be added
in a bit.
Add a foreground if you like, cliffs on
the side, trees, rocks, a ship sailing
over the end of the Earth..
The only critic that counts is you.
As they say everybody hates a cynic hahahahahahhaahaa....hey,
I screwed that cliche up ; ) |
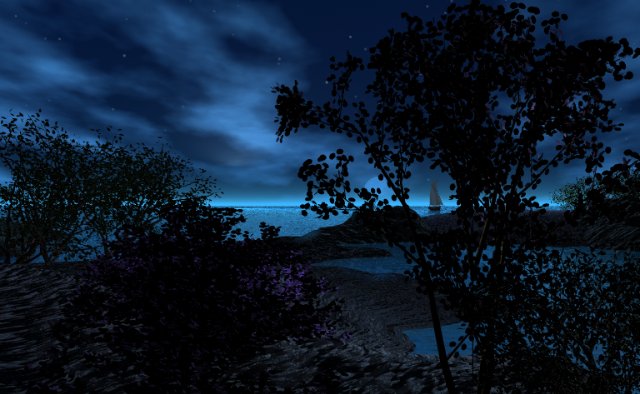
Sanity Check 3
|
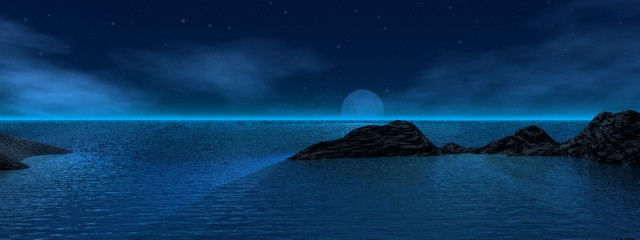
You
can see here how much of the terrains
are under water. I lowered the clouds
to create a misty effect.
The shadow\light and highlights on the rocks
open up and help balance the scene (how
traditional...geez).
The lights may need adjustment to fix that
double shadow at mid-left. I like it as
is. If there was a lower rock in front (which
there is) the shadow would appear slightly
less intense at that edge.
Sanity check file 3 - download here. |
Lighting
|
Create
6 Radial Lights..
All lights are plain old default Linear of varying brightness.
|
The
lighting is nothing fancy.
Traditional key\highlighting wont work
on a landscape so you have to fake it
; )
|
|
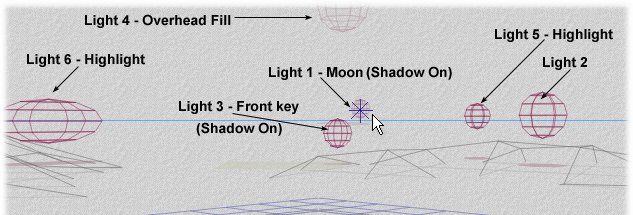
Six
lights were used. 1 to simulate the distant
moon - shadows on, 2 for far right side
highlight, 3 positioned front as key light
casting shadows, 4 is overhead as scene
fill, 5 as mid right highlight and 6 as
left side highlight.
Lights 2, 4, 5 & 6 have shadows disabled. | |
Bryce 4 - Editing Lights
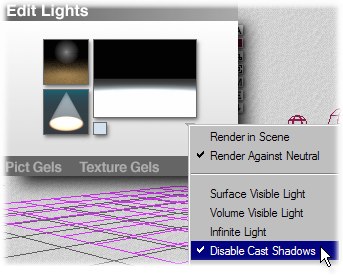 |
To
disable shadows in Bryce 4: select a light,
click Edit and check Disable
Cast Shadows.
The moon and overhead light are more distant
than they appear in the screenshot above.
See the Bryce file in the zip for distance
and Intensity reference.
|
Bryce 5
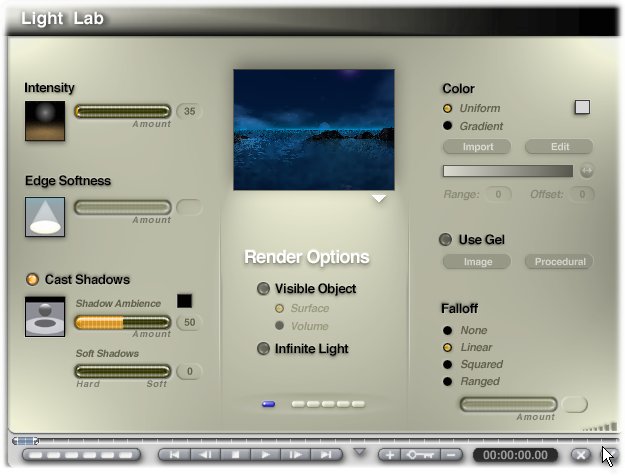
|
In Bryce
5 take the same route. Select a light >
Click Edit and click Cast
Shadows to turn on or off.
Intensity is simply how
bright the light is. I used about 200 for
the moon and overhead fill.
Bryce 5 has Shadow Ambience (how light the
shadows are to be quasi-oxymoronic).
This can help keep shadowed areas from becoming
completely black and allows detail to show.
The settings above were used on the front
key light # 3.
The light colors I used were light gray
and light pastel blues. |
Example result
 Render 'Suggestions'
You must do what
I tell ya or Uncle 'No-Neck' Nunzio
will be stopping by to play some Mystic
River baseball wit youse head and
kneeecapz...
1. Never, Never, Never,
EVER save your final render
as Jpeg.
Save your image as PSD, BMP, PICT,
TIF. Anything but JPEG.
Why? If you save as jpeg you've
already lost details. If you resize
to post on the web you will lose
more details.
In plain anglais - JPEG SUX. But
if you have a high quality 24 bit
image to start with you can minimize
the loss.
2. Render your final image
at least Twice the size you plan
to post at.
If you only do screen renders this
is especially important - you are
starting with a 72dpi resolution
and nothing can fix that. But re
sampling a large image down make
pixels appear crisper and color
more vivid.
For example, render this scene at
1280 wide if you want to post a
640 x 240 result.
I strongly recommend you
File > Render to Disk any final
image with the dpi set to at least
96dpi.
This is the current monitor resolution
and the only way to increase resolution
for print is found in the Render
to Disk dialog.
A large image also makes retouching
and post work much easier.
If you Render Big to Make small
your life will improve in every
respect. Trust me.
3. Do not use Bryce's Gamma
Correction.
It kills most everything it gets
near - it's worse than Kryptonite
; )
Use a photo edit or paint program
to adjust your gamma, brightness
and contrast. Bryce has absolutely
no flexibility in this area. Why
they put it in the program is a
mystery for the ages.
4. Speed up renders by using
'common' sense.
a. Defrag your system - if
you do CG daily, defrag when your
done. This does not harm your hard
drive contrary to some stupid urbano-computer
myths I've seen floating around.
b. Multitasking and rendering
do not mix by nature. Do you enjoy
waiting while nothing happens?
Do you like 'unexpected error -
terminating program now' messages
after you've put a week of work
into your scene?
I've watched people try to render
while having MS Office, Mail, Browser,IM,
firewall, anti-virus, 20+ background
tasks, paint app and games running.
If you're serious..shut down, reboot
and disable as many unnecessary
tasks as possible before starting
a render,
c. Get a good temp file cleaner:
 at CCleaner.com
d. Get Code Stuff Starter,

A startup-process manager to show what's slowing your system down.
Main site at http://members.lycos.co.uk/codestuff/
|
The End - for the time being.
Page 1 | Page
2

Thank
you for taking the time to view this - I hope
it helped in some way.
Pinhead - March 2005
Some more of my idiocy here. . .
|