Methods of Madness: Text in Cinema 4D Part 2
Using Sweep NURBS and Text Profiles
by Pinhead a.k.a Paul Pappathan
3DCommune.com
Part 2 of my 'can I drive you more insane with text only' experiments.
For all C4D users ...Version 6.x up
A Sweep NURBS needs at bare minimum a Spline and a Profile.
With Spline Primitive Text being used as a profile this method should lead you
to many discoveries.
You can use any text face installed on your system.
The exercise here shows text but remember you can sweep just about anything along
a spline
Let's get right to this sweeping along a spleen stuff..heheheh
1. Draw a B-Spline Curve on XY (Front View - Key F4)
The point where you start will be important - the 'front' face of the
spline text will appear at the first point where the spline is yellow.
The 'back' face will be the last point where the spline is red.
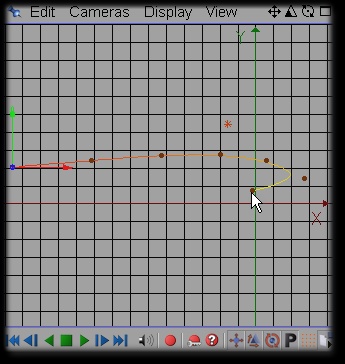
Manipulate the Spline in Point mode - as shown above (Tools > Point) until it
sweeps smoothly in the manner you need.
Hit the Enter Key.
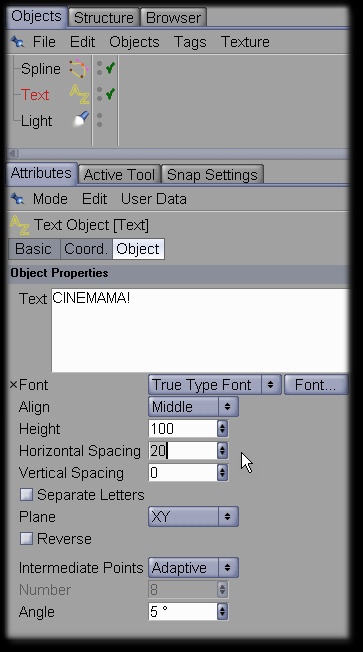
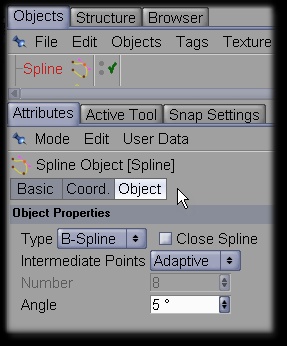
2. Drop in an Object > Spline Primitive > Text.
Under Attributes > Object > type in whatever text you want (be nice now ; )
This text is your Sweep Profile so it might be best to reduce the size.
Try a Value of 100 for Height and a value of 20 for Horizontal Spacing. This will
help keep the sweep cleaner and make a more detailed result without adding a lot
of polys.
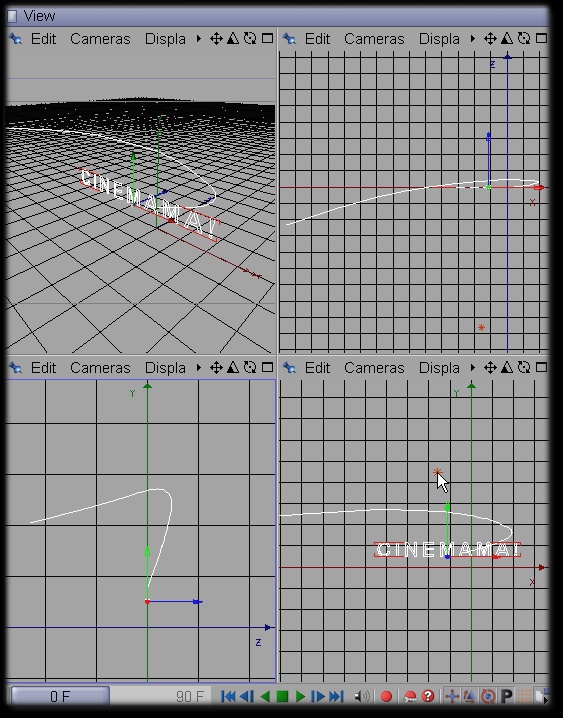
Using the Move function (Key T or Tools > Move) adjust the Text so
its near the start point of the Spline.
You don't have to be overly precise. Your views (Hit F5) should appear sometin
lika dis belowz:
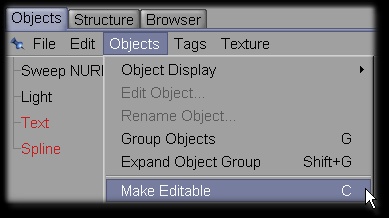
3. Select [Shift + Click] both the Spline and Text object and Make Editable
(Key C)
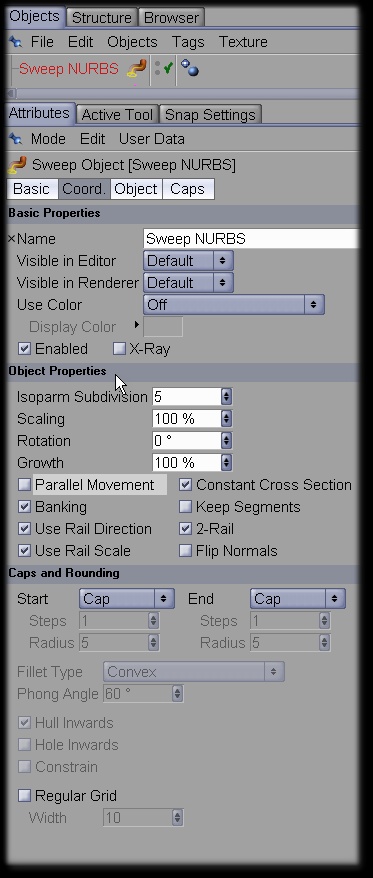
4.a Add a Sweep NURBS [Objects > NURBS > Sweep NURBS]
Here are the default settings:
Default Attributes of a Sweep NURBS
Prepare yourself for a suprise - this won't turn out as
you expect it would ; )
Or as you would expect if you've read the manual either....hahahahaa
Left click and drag the Spline onto the Sweep NURBS first, then drag the Text
onto it second.
Hey! What the?!?!?
Looks
like a design for the Death Rollercoaster at Canobie lake Park - Try digging
the letters outta this!
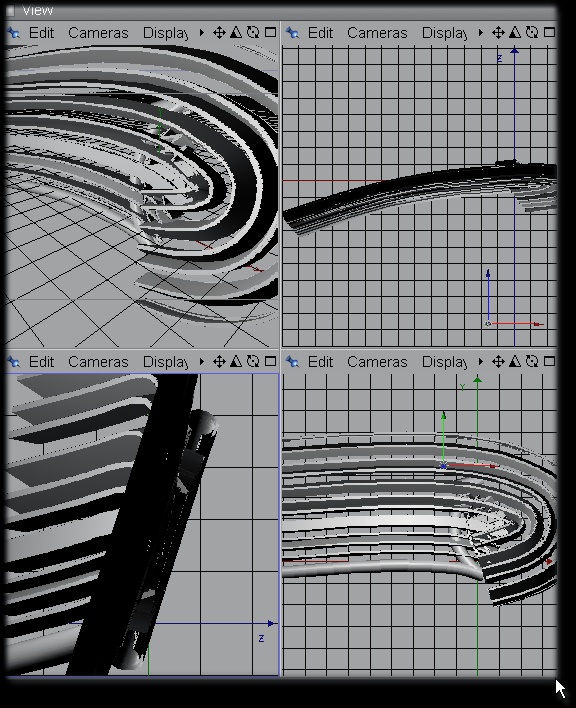
4.b Easily fixed, Don't Panic or call the Spline Police yet!
Click on the Sweep NURBs in the Object palette.
In Attributes Deselect Banking and Select Parallel Movement.
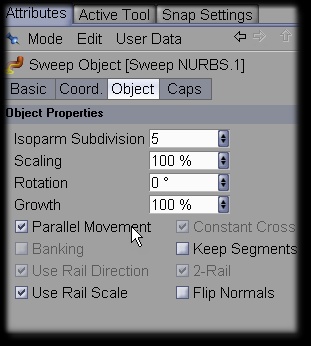
Note: Feel free to putz with the Scaling, Rotation and Growth parameters
while you're there as well as Caps.
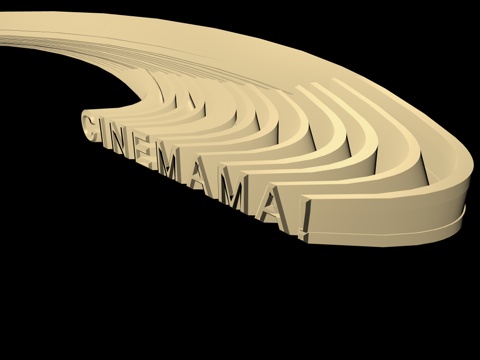
I used a Fillet Cap on the Start profile. It should now be a controlled sweep
looking something like this screen capture:
(I added a light to see the sweep path more clearly)
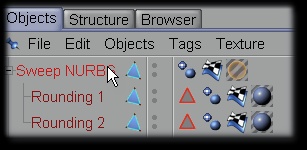
5. Once you have your view set as you wish Select the Sweep NURBS and Make Editable.
This will give you seperate surfaces for the text.
Key C = Make Editable
Make some nifty materials.
Rounding.1 is the text facing you.
Rounding.2 is the text on the backside.
The Sweep is the uhh, sweep.
I used a Start Fillet Cap (Convex) of 1 Step with Hull Inwards.
For an effect like the one I show you need to make a semi-transparent material
with edge glow for the Sweep.
I used 3 standard radial lights. One gold color over the extrusion and 2 blue on left and right front.
All had shadows down to about 30 percent.
Once you get NURB sweeps down you will find them useful for all types of models.
Zooming comets, bullet effects, curved roads, walls, waves, jet contrails and just about anything else you can imagine.
Experiment!
Simple Sequence:
- A. Draw Spline in XY
- B. Make Spline Text
- C. Make Sweep NURBs
- D. Make spline and text editable
- E. Drag spline then Text profile onto Sweep NURBS and make editable.
- Play as needed....
Pinhead Aug - 2004