Methods of Madness : Doze Wacky Spleens and Sweeps
Who needs a spleen in C4D anyhow?
by Pinhead a.k.a Paul Pappathan 3DCommune.com Didn't
I did warn you CG would make you insane...you're lost now kiddo...and
your internal stuff is leavin with ya
Let the janitor have it I say. My spleen that is.
This is a simple tutorial using splines and a spline primitive in Cinema
4D to make a fancy structural object.
In this case a roof I want for use later.
But it can easily serve more than one purpose simply by changing the spline type
as you will see.
Excited??! Me too!
Better tell Nurse Ratchet I'm late for my thorazine...
Unless you have a verrrrry steady hand you should Enable Snapping.
Use the Default Snap Settings please.
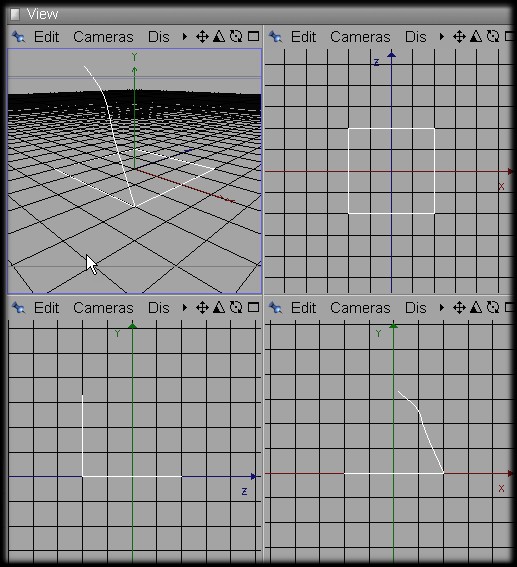
1. Using Perspective view drop in an Object > Spline Primitive > Rectangle.
Hit C to make it editable. [Function > Make Editable]
IMPORTANT - Make sure you Rotate it -90 on P (Y axis)
Amazin! Looks like a square lying on the floor...or is it a floor??
Leave it the default size and position for the sake of unity.
The rectangle is the base profile for the sweep.
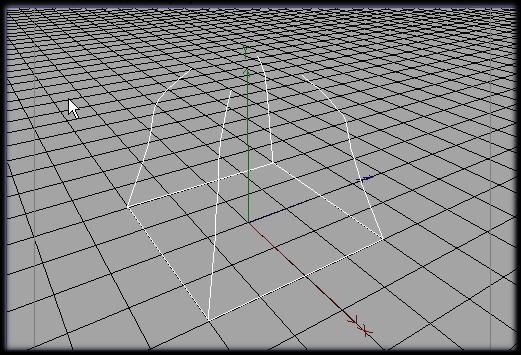
2. Still in Top View go to Objects > Create Spline > B-Spline.
Click on the right front corner of the Rectangle to place the first point of the spline precisely.
Activate the Front View [XY] and make another 4 points to create
a spline curve.
Use the Y axis line as a end guide but do not let
the last spline point touch it!
We have plans for that point ; )
After you make the first spline make sure you are in modeling mode.
[Tools > Modeling] You are here, I think
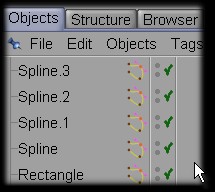
3. With the spline still selected in the Object palette, Edit > Copy >
Paste so you have 3 more numbered splines.
You should have Spline, Spline.1, Spline.2 and Spline.3 = 4 identical splines
(Copy\Paste sequentially numbers objects copied, Ctrl+Drag does not)
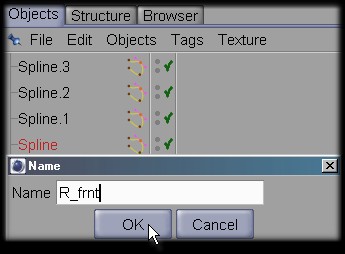
Double click each spline name to rename them...hahahahahahahhaa Redundancy, redundancy.
To keep your bearings name them something like R_frnt, R_bck,
L_frnt and L_bck.
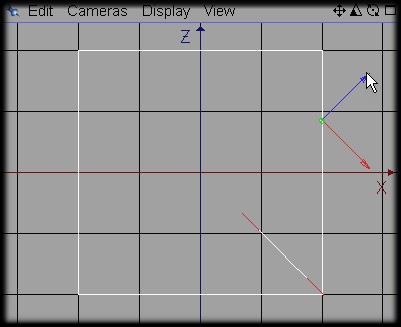
4. To make this a semi non-boring roof we're going to angle the splines 45 degrees in toward the center.
Starting with the spline you named R_frnt (originally just Spline) go
to Attribute > Cood.
In R_otation H type in -45 and
hit enter.
In Top View, use the X and Z Axis move tools (Blue and Red) to align the bottom of the spline
with the corner point.
As the rectangle is 400 units sqaure the corner points should all have the exact same X or Z +/- distance.
I think the number in my case was 83.909963117728001176312729812318 ...freakin math.
C4D rounded it up to 83.91 anyhow ; ) Y should all be '0'.
Rotation Values
R_frnt: R H = -45
R_bck: R H = 45
L_frnt : R H = 225
L_bck: R H = 135
And it shoulda looka lika dis:
5. Now for the fun(er) part.
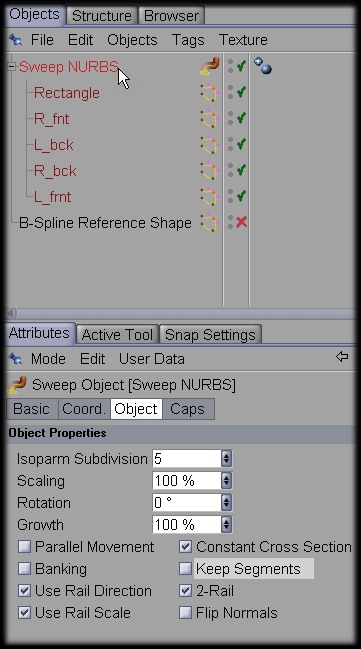
Create a Sweep NURBS [Objects > NURBS > Sweep NURBS]
Drag the Rectangle on to the NURBS first. WOW, ain't that nothing?
Carry on, trust me...
Arrange the splines as
shown below, dont worry if things go nuts.
Each spline will constrain the shape further.
Here's the Sweep NURBS settings:
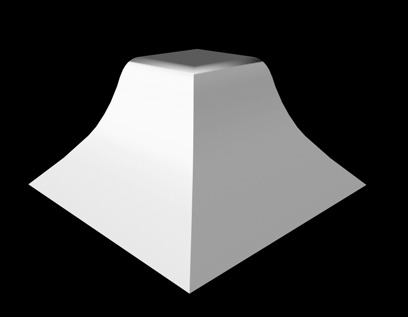
And the result :
6. I added Fillet Caps on both ends.
Phong Angle : 39
Fillet Type : 2 Steps
Hull Inwards and Constrain
selected for this result: My bell tower roof.
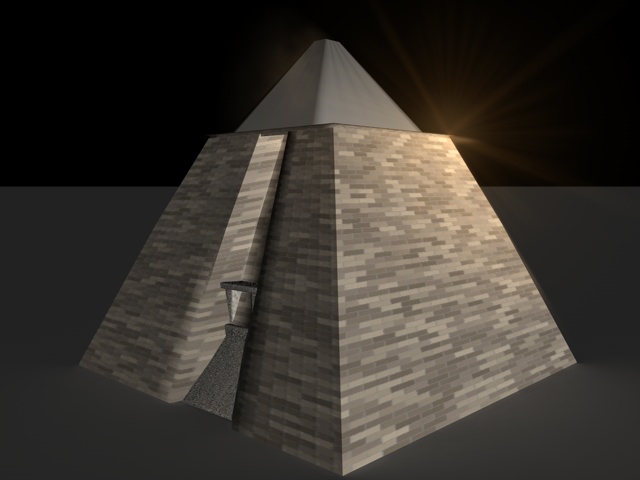
7. To change this object into something else, usually a bit difficult to make,
simply change the spline type of the Rectangle.
Resize, stretch on X and Z, change the caps if you got 'em.
4 shape splines aren't absolutely required, all you need is 2 opposing corners
but the results are much smoother using 4.
Or how about this? Made from the same setup.
Class get's dismissed and I'm still the kid in the corner with the dunce cap on ; )
Wave to me will ya?
Hey wait a sec, I got no class..heheheh
Pinhead - September 2004
Cinema 4D Version 8.5 used