Object example I used below is the Formal Dress from Poser 4© Female-Clothing.
Uhhh, I don't know many guys who wear dresses but who knows, it may soon be in the Unisex Clothing category...hahahaaha At least I get to play with a dress - I'd rather not wear it and I'm sure you'll thank me for this ; )
Lets see what we can do with this dress eh?
This instruction assumes you have MAXON BodyPaint 2 and know basic UV mapping.
It is meant for newer users of BodyPaints UV functions.
Let's start by getting the dress into BP...
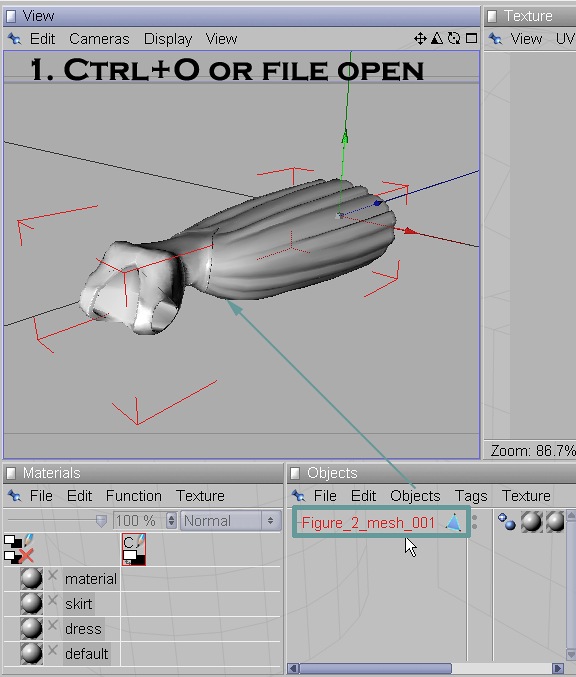
1.Ctrl+O, or File > Open. Find the *.obj you want to map and Open. The object will appear in the perspective view. By default the 'Texture View ' window will not show any UV mesh at this point.
2. Click 'Show UV Mesh' on Texture Window...not much to see eh? This shows only the inside of the dress.

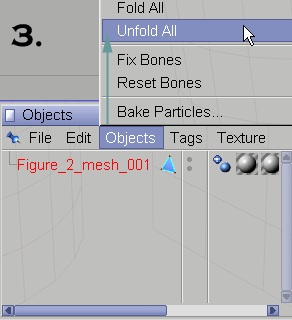
3. Select the item named in the Object palette > Objects > Unfold All.
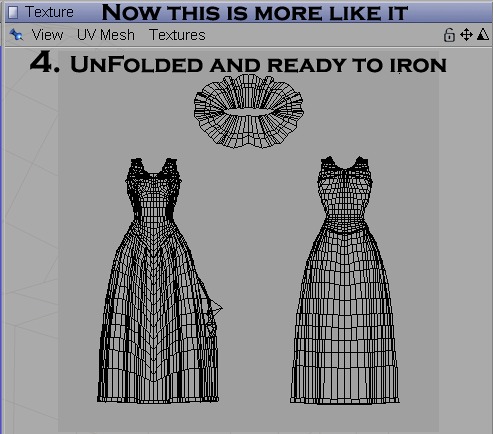
4. Make sure the item is selected in the Object palette and you should now see a 'normal' UV mesh map.
Because you don't have polys or point selection on you can not manipulate the map yet.
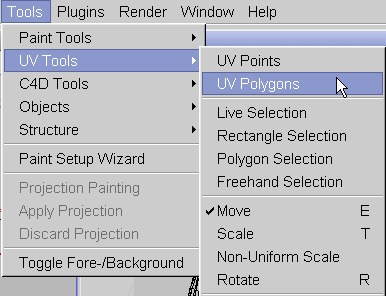
5. Soooooo, use the Tools > UV Tools > UV Polygons or click the Polygon Edit icon to activate all polys. Aha! Geez oh Golly Pauly...
Now the full UV Mapping function set becomes available for you to mess with ; )
(you can also select Points from the tool menu by the way)
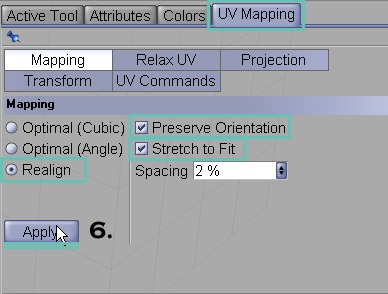
6. I usually select Mapping > Realign...
Use Preserve Orientation and Stretch to Fit first to fill the UV area and examine the map for defects. Select those shown and hit the Apply button.
Note: The Spacing option determines how much each mesh area is distanced from another.
The default of 2% usually works just fine and leaves room to work the mesh.
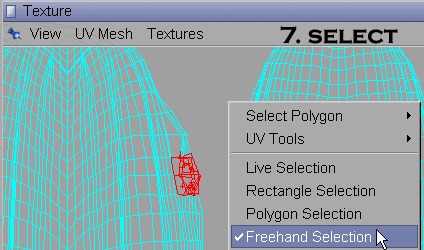
7. Now you can select wacky Polys or Points as you prefer using Live selection, Rectangular marquee, etc. as seen in most UVW apps are available.
All you have to do is Right click in the View or Texture window and all the options will appear.
Live selection seems the easiest to me when in Paulygone mode...uhhh Polygon that is... You can move [E], scale[T], rotate [R] and re-map any selection of UV's if needed.
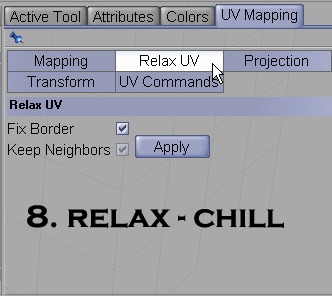
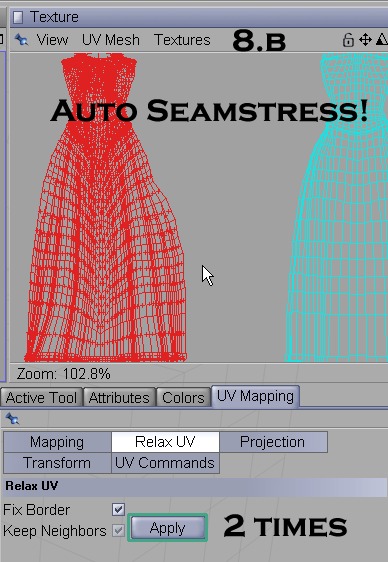
8. This is a good place to see the Relax function in action.
It quickly 'evens out' neighboring UVs making the mesh a much more consistent surface to texture later.
8a. In this example I selected the front of the dress (no comments please...lol), there are a few minor defects right near the seam.
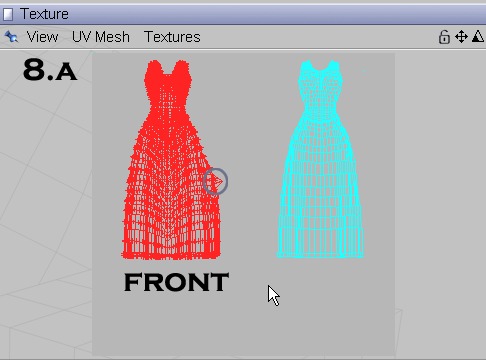
8b. After 2 hits of Relax...seams and overlapped polys all ok now...cool eh?
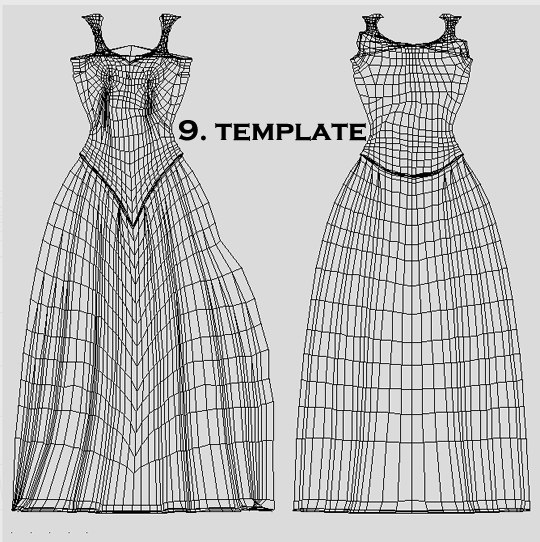
9. I shrunk the inside of the dress and maximized the front and back to allow detail painting later:
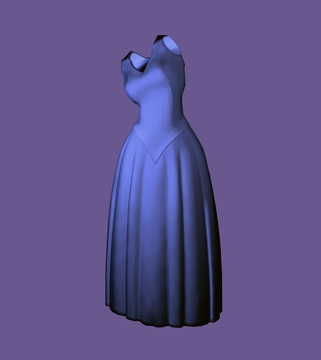
Rendered with plain color...
Hope this helped a bit. I assure you playing with Poser dresses is probably
a once in a lifetime experience for me.
Best regards ; )