Bryce Reflection Mapping ala Mode
Sorry for my Tardiness nice people ; )
I'm glad to see the interest.
I will start to write a tutorial (actually I did while I was posting so a lot of this is plain babble) or post a series in here so all can follow using the image above.
(uuhhhh what image Pinhead??, you on drugs or simply brain damaged?)
(I'm lyin again, there are images, I made different renders below, hiaaaayaahhhhialeah. . .forgive me)
This is an introduction to what Bryce terms 'reflection maps'.
"Environment map" would be more appropriate here - the name determines how it’s used.
In this case I am using the reflective *environmental* property of materials to impact all others used in a scene.
This is near the same impact the Sun and Sky colors would have but even more pronounced when used as described below.
Rendering engines use a virtual giant cube or spherical environment.
When Bryce uses a reflection map as a single stand alone material, a 'virtual' sphere is made that surrounds
the whole scene.
Whatever image\texture is on the reflection map is projected onto the surface (mirrored-reversed) of this
make believe sphere.
Whatever texture (or picture) is used is reflected to some extent [dependant upon it's properties] onto whatever
other objects are in the scene.
Sometimes the more rough, or irregular the object the better, that's why they work
very well with terrains in particular.
It is really kind of boring to see a reflection map on a reflective material ; )
But when used as a Combination Material like so:
Put a good Bryce mat in 'A' column and the sky image in 'D' > Reflection:
directly onto a 512 resoluton [or better] terrain, the object itself picks up on the Environmental
coloring in the D column. Very cool stuff.
All depends on how intense, light-dark the image is and how you vary other optical
and bump properties on the Bryce material in the A and other columns.
You must experiment and have patience, it is worth leaning.
Reflection maps make color adjustment\matching very easy and bring out terrain details.
Here’s a little example for you:
1. Make a lattice or 2D sky, or use default sky but lower haze way down.
(Click the ‘Gold Leo’ Icon to make a fast, to scale, 2D picture object for the sky.

1A. Picture Editor : Copy and paste the sky image from far left into middle
picture box .
Once here click a blank square or the word Load at the top Left.
Find you picture and Click Open.
Click Copy beneath the image at far left and Click Paste under the middle.
Click checkmark at bottom right to exit.
Load Paste
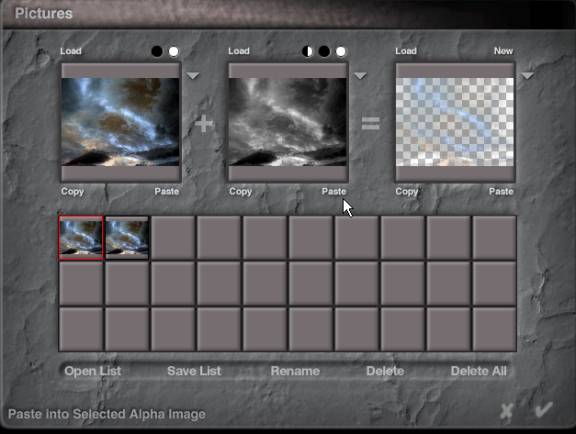
Check
> Exit
Onto the Mat Lab, the easy part here.
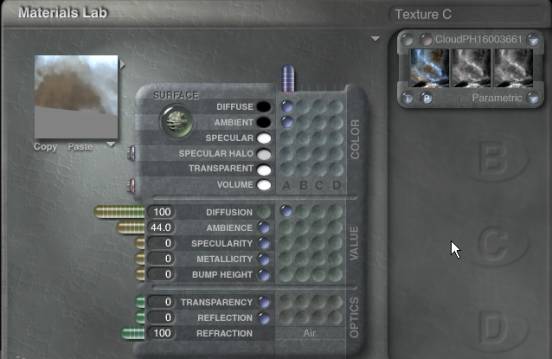
Sky Image in Mat Lab : See? Very simpilitio!
Just use these setting for now excluding the Ambience I used – my stuff is
always too dark.
Adjust yours accordingly.
The three previews at top right (Picture name & Mapping Mode) tell you
that the picture is a Color and Alpha combination.
This means the ‘middle channel’ can be used either as transparency or as
Bump Height.
Mostly anyhow…
Parametric means literally ‘on the parameter’ - here it simply means the
picture is made to fit the geometric parameters of the object used.
Click check to exit and resize\move the sky into the background in main work screen.
2. Create a terrain. Click [M] or use Ctrl+M to get to the Material Lab
 |
Terrain!
2A. For the terrain get a decent mat in ’A’ column, make sure it has good bump characteristics.
Try Mediterranean Hills in default mats, has a good bump and Voronoi noise for this.
Of course I don’t take my own advice and just made one up…you is welcome to it.
I’ll probably zip the whole file for download later.
Make the ‘A’ column mat so only the Bump Height has a selection in it.
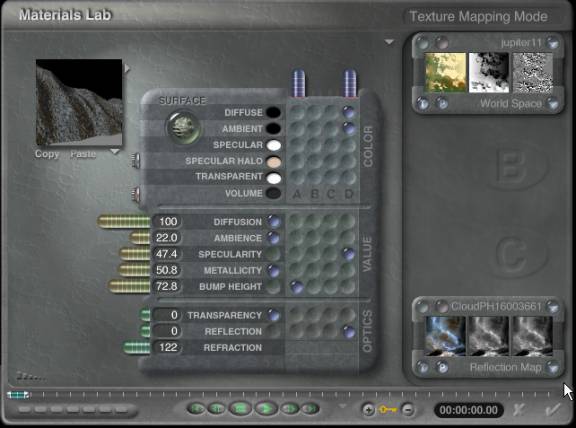
2B. Still in Mat Lab, still on Terrain >
Click in ‘D’ column > Select Diffuse and Ambient in Color section, Specularity
in Value and Reflection in ‘D’ Optics.
Click the little arrow where you see the cursor above and select Reflection
Map.
The diffuse and ambient selections will color the terrain to match your sky
without endlessly putzin with lights and gels.
(which putzin can also make putting models-trees-people into the scene are real challenge in regards to color, light and shadow)
< Note: Beneath the mat preview window at top left click the down arrow
at bottom right of picture and select ‘Actual Selection’ so you can see what’s
happening without goin back and forth to the main window – don’t drive yourself
nutz ; )
Also deselect Render with Neutral Sky – same place >
Scale the mat in ‘D’ while watching the preview window (click the green button,
top icon controls scale) I went to 9% shown below on page 5.
Crank up the bump height if you like and play with other settings.
You might think that scaling the pict map would make it tile but this doesn’t
happen (it’s object space).
The higher you set reflection the more of the global colors and ambience
the terrain will pick up.
When used this way it doesn’t really act as a ‘mirror’ even when set to maximum.
Only very small portions that have a high white value will pick up minor
reflects.
If searching for info you would get some more ideas using the term 'environment
map' but it doesn't quite apply to Bryce in the true sense.
Reflection mapping does mystical things in Bryce especially when used in
the 'D' column.
Do not think the lousy sucky jpegs below are accurate results!
Download the .br4 zipped files and mess with them and you will see whats what.
I hope this helped and thanks to Katheye for bringing up the challenge of lattice skies and color at the top ; )
My appreciation to sassyass, greywolf1960, Damsel, Scott <relicglass> and Mark a/k/a Monsoon for their ideas and encouragement.
I do drift don’t I…hahahaha
Have a great morning all,
Paul a/k/a Pinhead www.3DCommune.com 7/13/2003 2:05:57 AM
(written ‘live’ while reading post in Bryce forum)
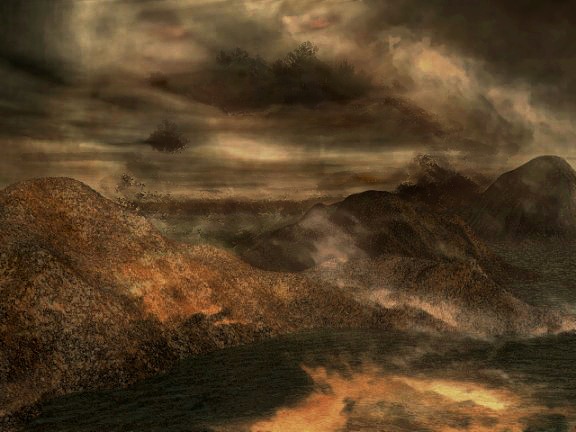
Hey…where’s the damn results!?!?!? never mind. Found them. . .hahaho
Note: the image colors from 'D' are predominant and heavily reflected.
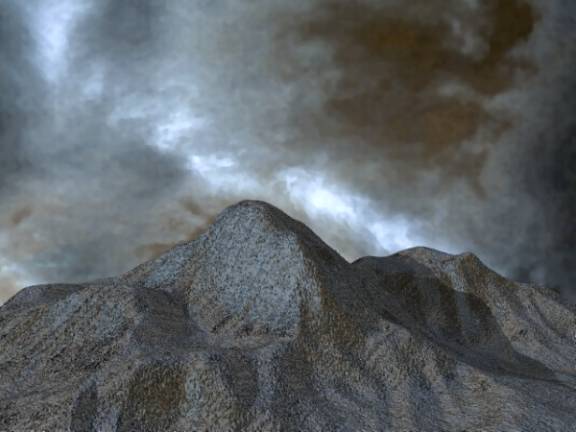
Used Plain black sky – no haze
Sample Bryce 4 files here.
1] Shown Above: Terrain reflect map - black sky 5.1 Meg zip
2] Shown Below with tons of postwork heh: Reflection Tricks 5.6 Meg zip
©Pinhead 2003-2007
Links fixed Aug 2007.