Updated 14 May 2002 - Added Bryce 5 Light Lab Info
Sky Effects For All
Sky FX Part 4 - Light, Gel & Render
Finally! Man, this took a bit more doing than I figured.
Maybe it will teach me to pay attention to what I do...
naaaaah, who am I kiddin?
I'll still just throw things around, more fun.
Shed some Light on the Subject
Bryce 4 shown first - Bryce 5 here. The same info applies to both.
Please read the B4 section so you know why you're doing what you're doin!
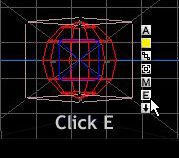
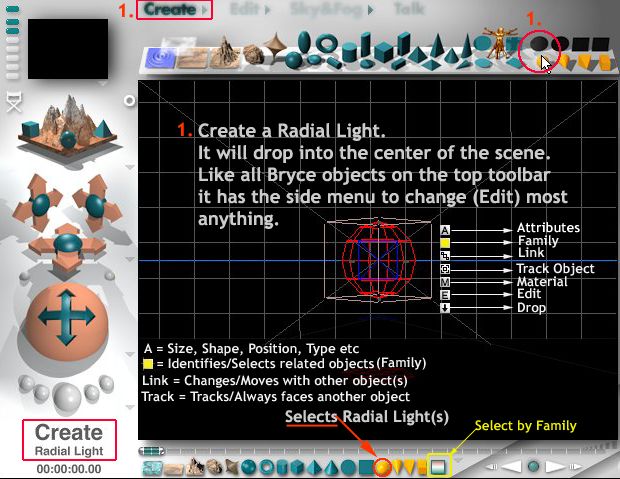
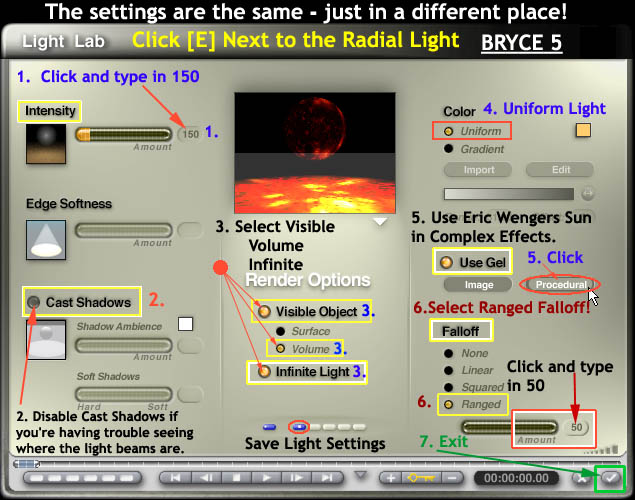
Click E, Lights have tons of options. . .as shown below:

All the settings I used are shown - feel free to ignore them!
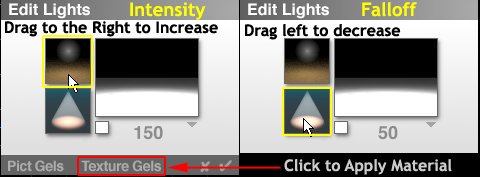
For now, please set the Intensity and Falloff as I did then click the words Texture Gels.
You'll jump right to the Materials Preset Library. Click on Complex fx.

I used this mat because of it's transparent properties.
Click to Apply or
you can download 3 modified BR4 (work in Bryce 5 also) gels I made right here as a small zip.
Unzip and click on the word Import above to find and load them into your material library.
You'll return to the Edit Lights Option.
Change the color to yellow, red, orange whatever you like.
Remember where this is ([E] next to the Light) in case you want to change it.
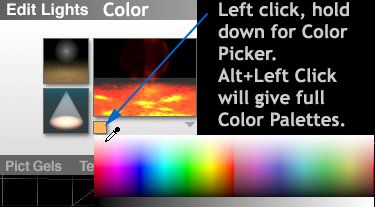
By the way, anyplace you see a color these options for choosing are available.
I use HLS (Hue Luminescence Saturation) because it seems the most intuitive.
Trying to choose color by RGB is time consuming and dull.
Of course they gotta do things different...just to make life difficult.
When you Click 5 above browse to Complex Effects and use Dreams of Xanades Lake as instructed in the B4 section.
Clicking the check mark will return you to the main screen.
If you're having problems at this point take a look at the Mat properties.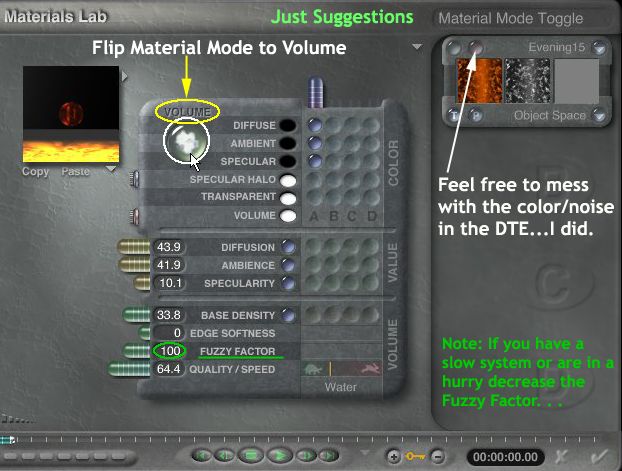
(If the Mat doesn't look correct click the letter M next to the light and make sure it's set to Volume Material Mode).
If you feel daring go into the DTE and change the center color and other characteristics.
Click check to exit then click check at lower right of Edit Light box to apply and return to the main screen.
Once there, hit Edit and move the light back into the terrain using the Z and X move controls.
I do mean INTO the terrain, this is how the light is broken into rays
Position the light so it's aligned to the top right corner of the Camera as seen in the Nano Preview

Here's a view from the top - see what I mean?
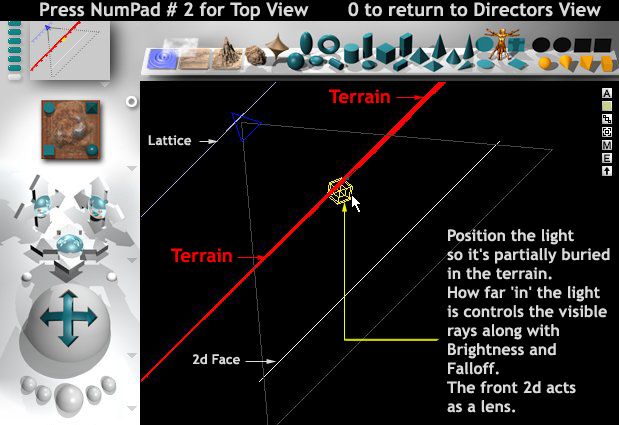
By moving the light in (away) further the beams will lessen.
Falloff also controls this. . . Tweak away as needed!
Return to standard Directors View anytime by entering 0 (zero) on the numeric keypad.
Rotate the light - the changes are dramatic.
Time to Render
Screen Renders - My thoughts
I don't recommend screen renders for anything but previews and setting up your workspace.
Once you find a setup you like, Save as default.br4 or default.br5 in the same folder as the Bryce.exe .
Each time Bryce starts it will return to the state you want.
Make sure whenever you save other Bryce scenes that you always use File Save as...Not Save.
And give them a new name!!!
For some strange reason the default name given to any file your try to save is Default!
Not smart naming convention...don't panic though.
It's easy enough to reload the file and give it a new name.
You will simply have to make another default file.
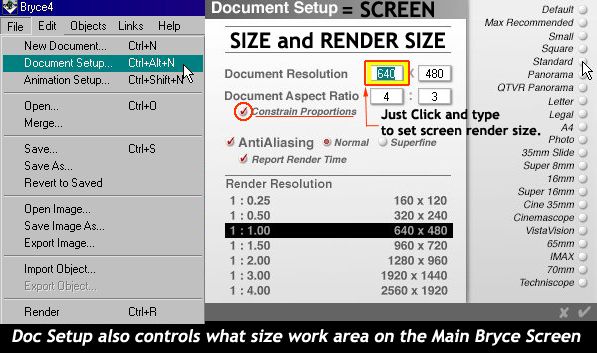
Max Recommended (864x610) is fine for most 17 -19" monitors if you're running at least 1024 on your desktop.
If you use 800x600 as a desktop try setting up for a 640x480 work area.
Do not Render as jpg...they suck.
Save all original renders as PSD, BMP or PICT then convert to jpeg for posting.
Your results will be more controllable and look 10 times better. Really and truly.
Select from the drop down list when you decide to Save Image as...
Here's How to do it right!
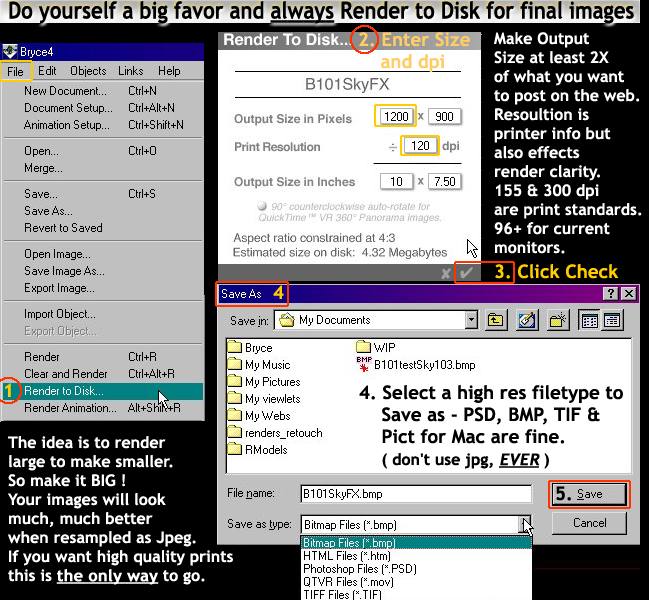
Soooo, if you're going to post an 800 x 600 image, your render settings should be:
1600 pix wide x 1200 pix high x 96 dpi minimum.
96 dpi is now the effective resolution of consumer monitors. Not 72.
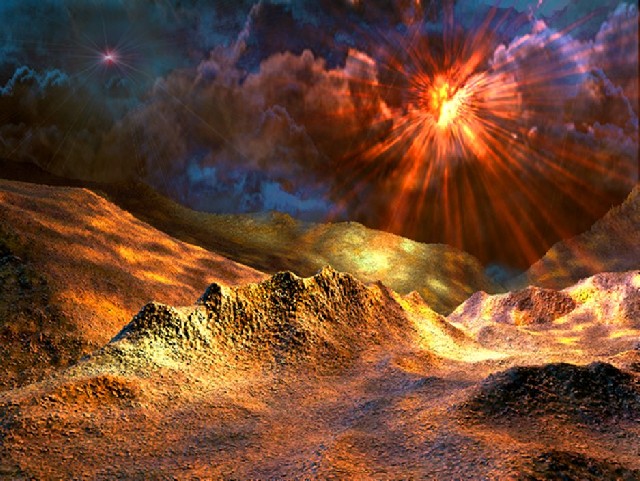
Some results (Screen Renders in this case)
The original sky\scene with some terrains thrown in front and a lattice flare.
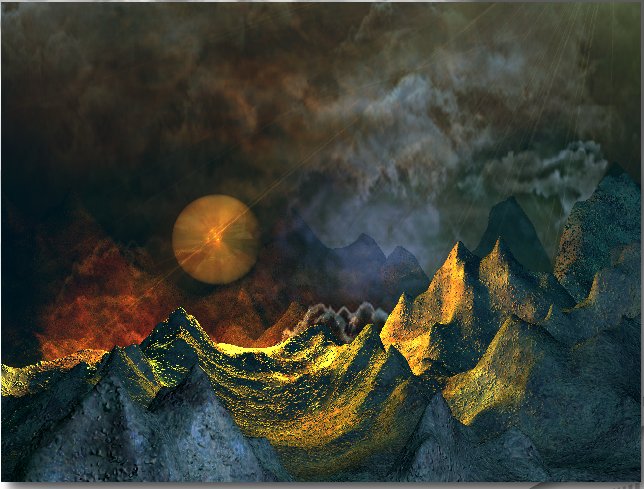
Another scene, different foreground, using Shadows, Haze and a standard radial light up front.
I moved the ranged falloff light to a position in between the lattice and middle 'sky' terrain.
I'm done! Yeaaaaah, hahahaha..it's Coke and Smoke time!
I know this was long and a bit dry but I hope it met my intent of showing newer users around Bryce. Maybe it even got you exploring - drifting as I tend to do. That's how I've found most of what I share in these tutorials. Perhaps you'll do the same in the future...
Sharing knowledge is what it's all about to me and it's a pleasure to be able to do so.
Keeps me half alive..the other half? Who knows???
Best regards,
Pinhead - a/k/a Paul
Now 2005 . . .god help meeeeeeeee