Sky Effects For All
Sky FX Part 2 - Sym Lattice
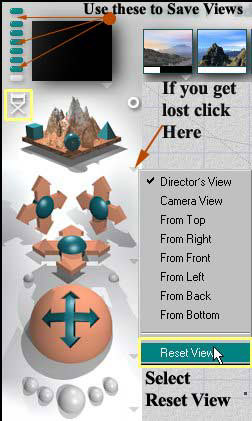
FYI: Use the small teal buttons at the left of the Nano Preview Window to save Views. If you lose your View you can restore the default view by clicking the small down arrow to the lower right of the View Selector (the thing that looks like a terrain with a sphere, cube and triangle) and scrolling down to Reset View. Make sure you reset the Camera as shown in Basic Setup.
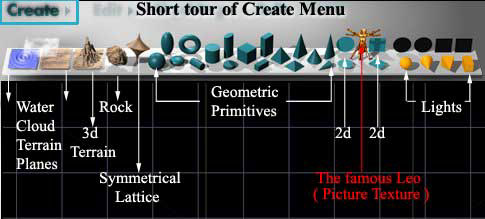
First a very fast look at the default Create Menu. If you click on any item shown it will drop into the center of the scene. The three plane types (Cloud, Water and Ground plane) will give you a Volume option if you left click them and hold down a second.
Ok. Here's how to make something with a Symmetrical lattice. This will be the longest section but the methods shown apply to Terrains and 2d objects also.
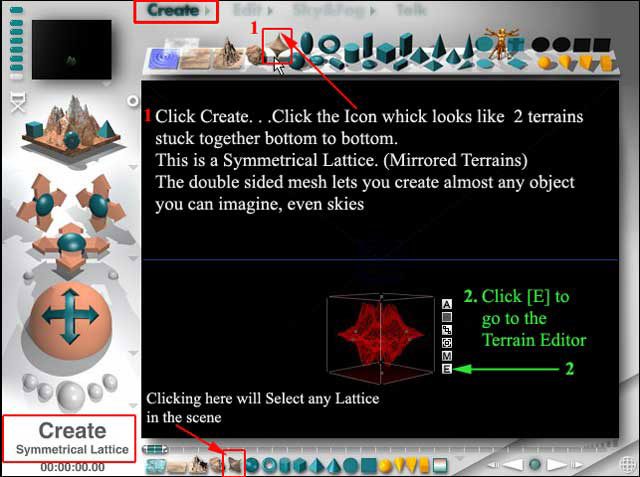
Click [E] for a look at the Terrain Editor...off we go. . .
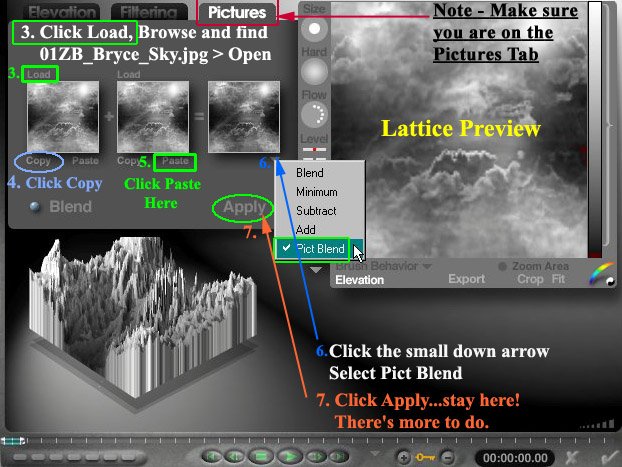
I used Pict Blend here because it averages the Dark/Light values of the picture loaded.
This dark/light is the Mysterious Alpha that is always being mentioned without explanation. All it is, is a value used in Bryce based on the pictures Grayscale - when you load a picture here it is converted into a black/gray/white image.
Think of it this way. . .
| Pure Black is the Bottom Ground level/transparent | Medium Gray is 'Middle Ground' | Pure White is the Top |
There are many shades of gray in between which allow you to make true 3d objects depending upon how these are mixed. The fact that Black can be transparent ( a zero/null value if you will) has many uses if you want to make objects like windows, buildings, skulls, anything that has transparent areas. You would simply paint pure black where you wanted the 'holes' to be. Understand?
For the mathematically inclined the default height values here range from 0 to 255.
0=Pure black, 128=Medium Gray, 255=Pure white.
Let's get on with this, sorry if the explanations are boring. I simply want you to know why this works.
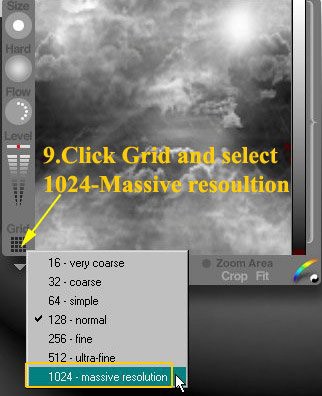

Using 1024 res will help smooth out defects.
If the lattice isn't Solid this will not work. It will be invisible...(because it can't 'see' the gray values unless it has a solid mass to put them in)
We're done here so let's go back to the Main Bryce Screen.
Left click at the top (Y Axis) of the Edit/Resize tool as shown.
Drag to the left until the lattice is paper thin.
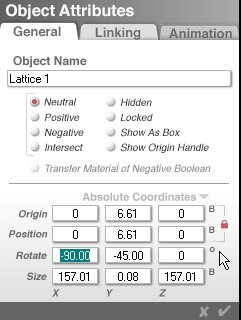
Or you can resize numerically by clicking [A] (Attributes) and typing directly into the Size Y box.
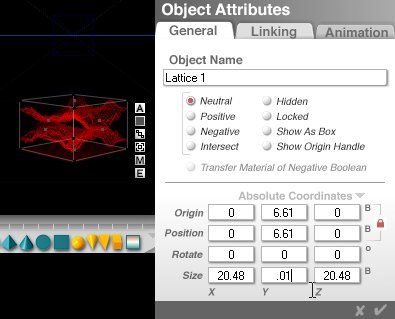
A Check mark in Bryce always means Apply the change and Exit.
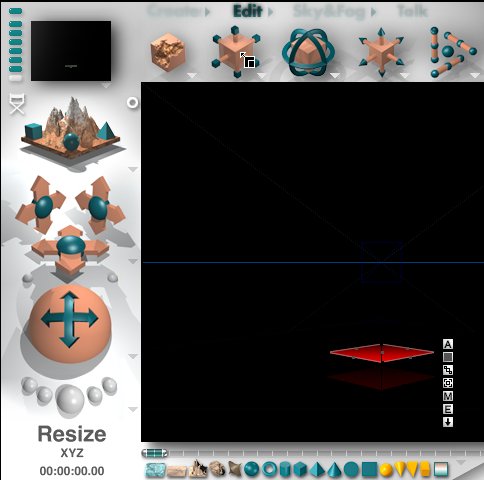
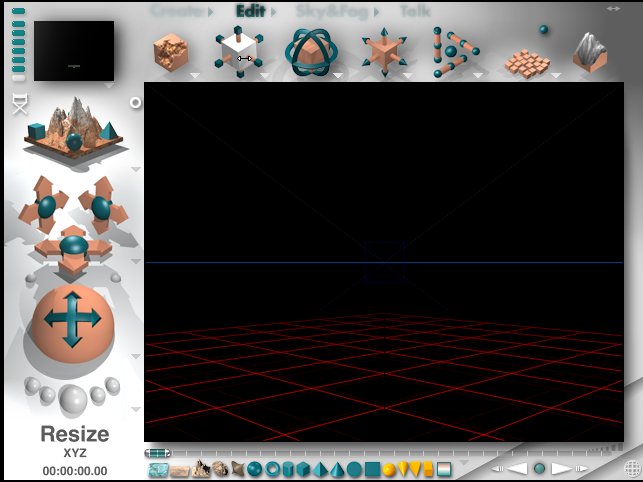
Left click in the center of the Resize tool (Resize XYZ), hold down and drag to the Right until the lattice fills to the front-foreground of the work area.
This is how it should look at this point. . .
Hold down the Shift key for the next 2 steps. This constrains rotation to 45 degree increments.
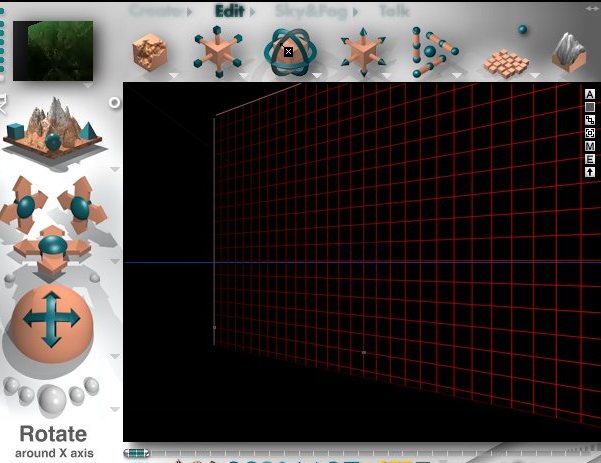
While holding down the Shift key left click and drag the Rotate World X control to the right.
Watch the bottom left corner for information as you do this. It will show 2 'steps' of 45 degrees.
When you see -90 stop.
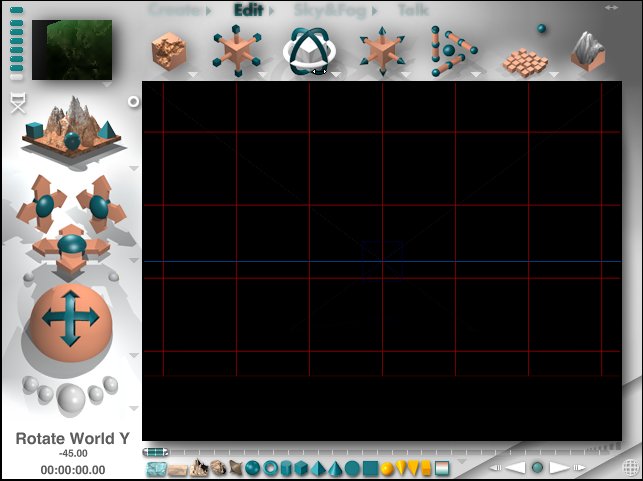
Hold Shift again Left click, hold down and drag left on the Y Rotate control until it hits the first stop of -45 degrees.
The lattice should be facing directly towards the front.
Hopefully this is similar to how your scene looks now also!
You can do all of this Resize and rotating using the Attributes [A] entry boxes also. Here's what the numeric values were for me.
I need a break!!!! And a smoke, and a beer and perhaps some other entertainment before I continue with how to apply a material (an image in this case) to the lattice.
Remember, I'm going to use the image I made 3 times in this example but you certainly don't have to.
There are plenty on free picture texture sites on the web with decent clouds - you can get great results by combining 3 different cloud structures for a super turbulent sky. Or different color clouds for some very surreal results. Nothing here is written in stone.
Be right back...hahahaha. Like you know where I am and how long I'm gone.
If you do, I'm terrified!
Click Material for the next section.