Visible Light from the Ground Up - Part 1


Written because I was asked a simple question.
Who is I?
Pinhead a/k/a Paul dats who.
I'm nobody special, just someone who happens to like Bryce and the people who use it.

|Page 2|Page 3|Page 4|


Statement Of Purpose (SOP):
Why from the ground up you ask?. . .you didn't ask? . . .I tella youse anyhow.
I went searching for de Light and lo (or is that YO momma?) and behold I found not one, but none (heheh) tutorial that didn't assume at least a working knowledge of all Bryce, excluding the DTE.
So I figured if I was going to show how to do this I might as well start from the bottom.
Hey buddies,please refrain from jokes about my heritage

This is goin to be a biggie and is available as a zip file below for phone modem users.
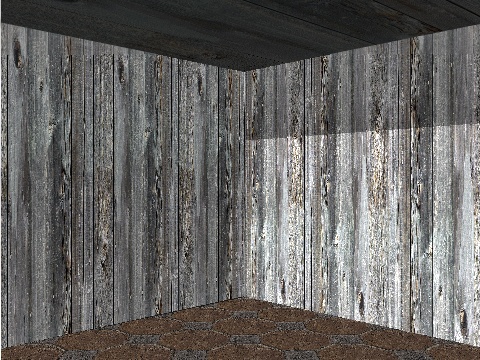
It's meant to illustrate how to create visible light through room windows.
One problem though! No Room yet...heheheh.
No room, no light and no place to visit on weekends when you're bored stiff and wanna do bad thingz away from the tikes.


So for the benefit of newer users (who hopefully have a ton of patience) I'm going to explain all I can.
We'll make a basic room, use the terrain editor to create negative boolean window cutouts, Add a few shapes for window sills and rafters, stick some mats on, disable the sun then finally add the visible lights and atmosphere.

I did this in Bryce 4, if you use Bryce 5 the methods are the same but there will be differences in the Terrain Editor and Light Lab interfaces.
I'll try to link to appropriate screen caps of the Bryce 5 'improved' areas.
Righto - 'improved' my a$$...I looooove Bryce 5. Really.

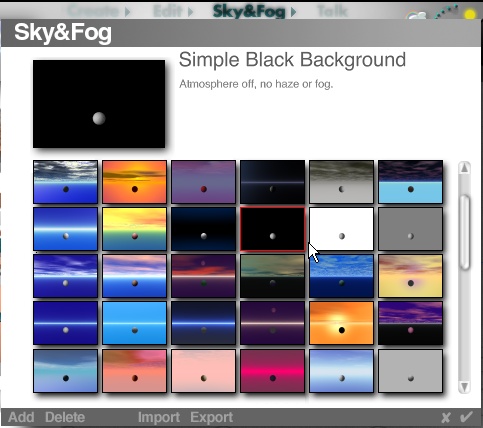
Okie dokie smokie, enough babble. Lets start with the sky, or in this case let's not ; )


First, you have to start Bryce...hahahhahaa
Click on Sky & Fog and select the Simple Black Background.
Use Directors View.


Next, Click Create then the 2d Plane icon shown - these will be used as walls.


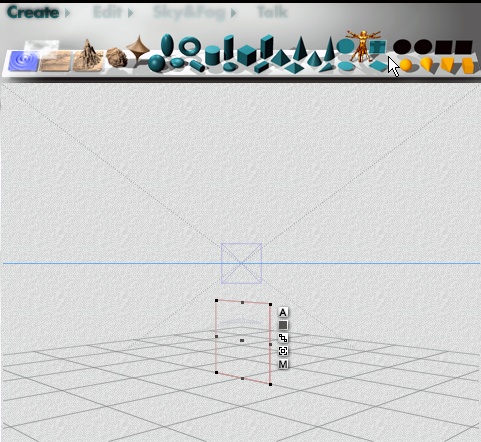
Duplicate the 2d by using Ctrl+D and then Edit, Rotate the 2nd plane 90°.
(Hold Down Shift to constrain to 45 ° increments)

Position the 2nd plane so it lines up with the first and serves as the back wall.
You'll only need 2 walls as you'll be looking into the scene from the front.


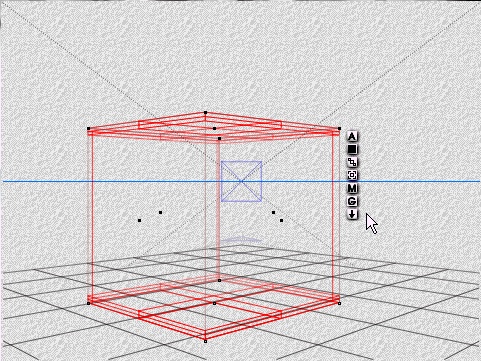
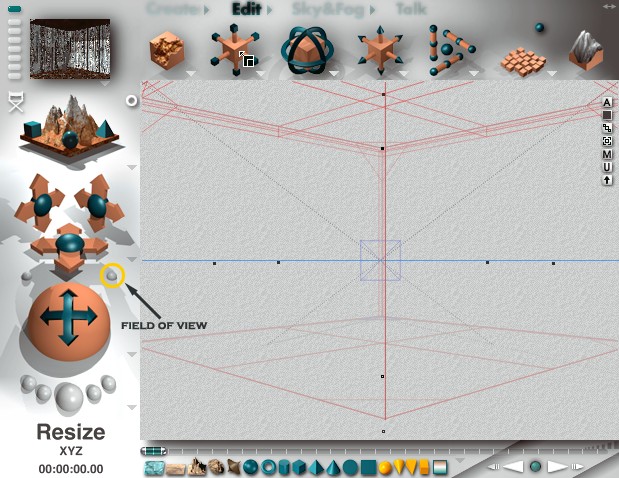
Create a Cube and squash it semi-flat on Y (using Edit > Resize Y control) for the floor.


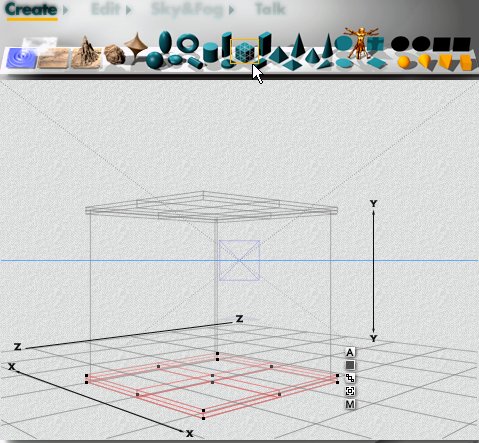
Ctrl+D again and raise the duplicated cube up with Reposition Y control (Resize and Reposition shown below) to make the ceiling.


Take me away to booleaniville and get me 5 marguritas please.
Select each part one at a time, Click A next to the item.
Make each piece Positive or else you're in for a weird room folks.
You should see mine - rats would get sick there..hahahahahha


It's a good idea to name each part where shown above...trust me, it is.

Being Positive rather than Neutral allows it to be 'cut' with Negative objects.
Being Positive can also make you happy. (or perhaps insane if cutting is your idea of positive!)

Texture and Grope' la Roomez

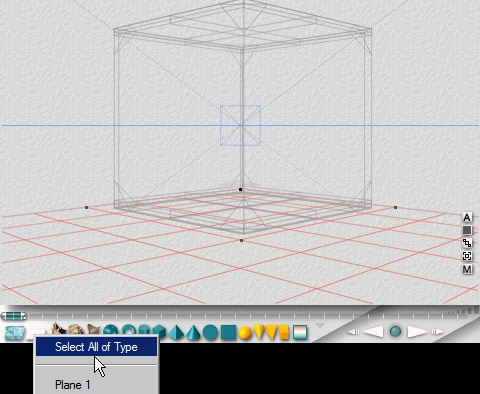
You can select each piece individually by Ctrl+left click and texture as you like.
If you prefer you can download all materials/textures/sky used here:
| Download Vis Light Room Mats - 4.1 meg zip |
Note: The whole Bryce 4 scene file is available below.


Uhhh, I mean GROUP of course ; ) What fun would groping a room be anyhow?
You do this by selecting each part - walls, floor and ceiling then clicking the [G] button.
This makes it all stick together as one unit.


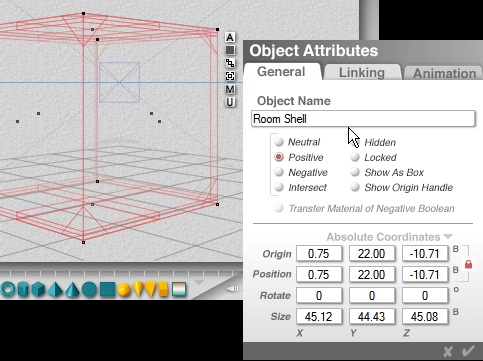
To be able to make windows in the room shell you must make it Positive.
Click [A] next to the grouped items and select Positive.
Give it an innovative and creative name whilst there ; )
Click the letter [M] and texture as you wish.
Again, you can select individual parts by using CTRL+Left Click near a wall, floor etc,.
If you want to use the same stuff I did it is also available in a 6.8 meg Bryce 4 file.

*** Download it here if you want it | LightRoom br4 ZIP | ***

This file contains the complete setup with grouped room, sky settings, mats, grayscale, lights, terrain booleans that are show in the final result.


One last step then on to Page 2....hehehehaaaa, yes there's more of this.
Terrible ain't it?


Click the Ground Plane symbol on the bottom selection bar.
Select Plane 1 and then hit the Delete key. We don't need no stinkin ground here!


Use Edit > Resize XYZ to make the room fill the screen to the foreground.
If needed, use the Field of View control (above) to move it forward or back.
All this for just a room... efficiency is my 3rd middle name.
Here's where you should be at if you render now:


Alrighty then. Onward Brycean Army beanz to page deux! Click below ; )

Part 2 - Creating a Terrain Window


|Page 2|Page 3|Page 4|